Manuals/Neo FreeRunner/it
From Openmoko
Jollyr0ger (Talk | contribs) (translations) |
Marko Knöbl (Talk | contribs) |
||
| (66 intermediate revisions by 11 users not shown) | |||
| Line 1: | Line 1: | ||
| − | {{Languages| | + | {{Languages|Manuals/Neo FreeRunner}} |
{| class="wikitable" cellspacing="2" cellpadding="2" style="padding: 0%; margin:0em 0em 1em 0em; border:1px solid #cccccc; background:#eeeeee; width:100%;floating="center"; " | {| class="wikitable" cellspacing="2" cellpadding="2" style="padding: 0%; margin:0em 0em 1em 0em; border:1px solid #cccccc; background:#eeeeee; width:100%;floating="center"; " | ||
| − | ! style="background:#fcfcfc;border-left:1px solid #9999cc;border-right:1px ; border-top:2px solid 75d806; border:1px solid #222222; width:75% " | | + | ! style="background:#fcfcfc;border-left:1px solid #9999cc;border-right:1px ; border-top:2px solid 75d806; border:1px solid #222222; width:75% " | |
| − | + | <div align="left"> | |
| − | Grazie per aver comprato questa versione da Sviluppatori del Neo | + | Grazie per aver comprato questa versione da Sviluppatori del Neo FreeRunner. Il telefono [[Neo FreeRunner]] è la seconda piattaforma hardware che sfrutta nativamente [[Openmoko/it]]. Questa guida ti aiuterà a conoscere il tuo Neo FreeRunner e ti indicherà come inizare ad usarlo. |
! style="background:#fcfcfc;border-left:1px solid #9999cc;border-right:1px ; border-top:2px solid 75d806; border:1px solid #222222; width:25% " | | ! style="background:#fcfcfc;border-left:1px solid #9999cc;border-right:1px ; border-top:2px solid 75d806; border:1px solid #222222; width:25% " | | ||
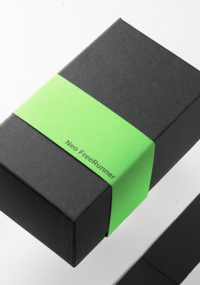
| − | [[Image:Freerunner box.png|200px|thumb|La confezione del Neo | + | [[Image:Freerunner box.png|200px|thumb|La confezione del Neo FreeRunner]] |
|} | |} | ||
== Contenuti della Confezione == | == Contenuti della Confezione == | ||
| − | |||
{| class="wikitable" cellspacing="2" cellpadding="2" style="padding: 0%; margin:0em 0em 1em 0em; border:1px solid #ffffff; background:#ffffff; width:80%; floating="center"; " | {| class="wikitable" cellspacing="2" cellpadding="2" style="padding: 0%; margin:0em 0em 1em 0em; border:1px solid #ffffff; background:#ffffff; width:80%; floating="center"; " | ||
| − | ! style="background:#ffffff;border-left:1px solid #ffffff;border-right:1px ; border-top:2px solid ffffff; border:1px solid #ffffff; " | | + | ! style="background:#ffffff;border-left:1px solid #ffffff;border-right:1px ; border-top:2px solid ffffff; border:1px solid #ffffff; " | |
<div align="left"> | <div align="left"> | ||
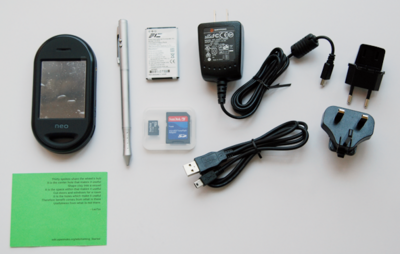
[[Image:GTA02ALL.png|400px|thumb|All'interno della Confezione]] | [[Image:GTA02ALL.png|400px|thumb|All'interno della Confezione]] | ||
| Line 26: | Line 25: | ||
</div> | </div> | ||
| − | == Iniziare a Conoscere il Neo | + | == Iniziare a Conoscere il Neo FreeRunner == |
| − | + | ||
<div align-center> | <div align-center> | ||
<table width="80%" style="clear: both; border: 1px solid #ffffff; border-collapse: collapse; padding: 0.2em; margin: 0; font-size: 100%; margin: 0 1px;"> | <table width="80%" style="clear: both; border: 1px solid #ffffff; border-collapse: collapse; padding: 0.2em; margin: 0; font-size: 100%; margin: 0 1px;"> | ||
| Line 33: | Line 31: | ||
<td style="width: 25px; padding-left: 0.5em;"> | <td style="width: 25px; padding-left: 0.5em;"> | ||
</td> | </td> | ||
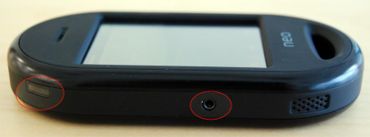
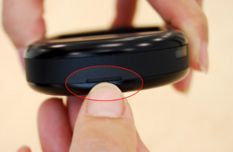
| − | <td style="width: 10px; white-space: nowrap; padding: 4px 1em 0 0.5em; border-right: 1px solid #ffffff;">[[Image:menu8.jpg|370px|thumb|Pulsante AUX | + | <td style="width: 10px; white-space: nowrap; padding: 4px 1em 0 0.5em; border-right: 1px solid #ffffff;">[[Image:menu8.jpg|370px|thumb|Pulsante AUX e jack cuffie (da sinistra a destra)|center]]</td><td style="padding: 1px 1em 0; background: #ffffff;"> |
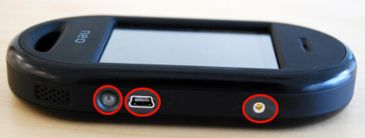
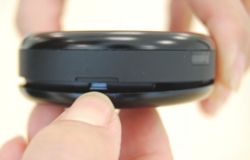
| − | [[Image:menu9.jpg|365px|thumb|Pulsante di | + | [[Image:menu9.jpg|365px|thumb|Pulsante di accensione (Power), porta USB e antenna GSM esterna (da sinistra a destra)|center]]</td></tr></table> |
</div> | </div> | ||
| Line 56: | Line 54: | ||
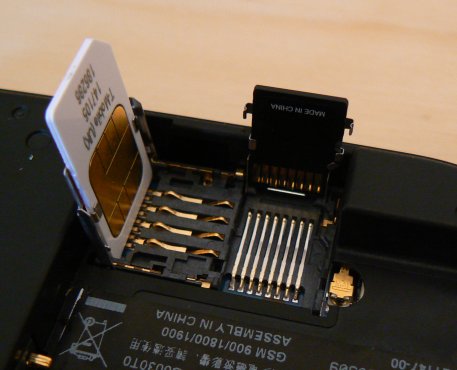
=== Inserire la scheda Micro-SD, la SIM e la Batteria === | === Inserire la scheda Micro-SD, la SIM e la Batteria === | ||
| + | # Rimuovere la cover posteriore del Neo FreeRunner tenendo il dispositivo per i lati e, con l'unghia, facendo leva nel taglio visibile nella parte superiore del dispositivo. | ||
| + | # Individuare il sistema che blocca la scheda SIM e la memoria Micro-SD, al fianco dello scomparto per la batteria. | ||
| + | # Sganciare il blocca scheda SIM facendo scivolare con l'unghia la parte metallica verso il basso (ovvero in direzione dell'entrata USB). Prestare attenzione durante l'operazione, poichè, data la delicatezza delle parti esse potrebbero rimanere danneggiate se forzate nella direzione sbagliata. | ||
| + | # Sollevare il blocca scheda SIM. | ||
| + | # La memoria Micro-SD è bloccata da due fermagli su ambo i lati. Per una maggiore sicurezza, sarà possibile aprire l'alloggiamento per la Micro-SD sbloccando i fermagli uno alla volta, anziché tirando dal centro, poiché quest'ultima pratica tende ad aumentare la pressione sui fermagli laterali. Un cacciavite o un piccolo coltello possono aiutare in questa operazione. | ||
| + | # Inserire la memoria Micro-SD nell'apposito spazio. Assicurarsi che i contatti elettrici siano rivolti verso il basso e vicino al bordo del Neo FreeRunner. | ||
| + | # Chiudere il blocca scheda Micro-SD assicurandosi che entrambi i fermagli siano ben agganciati. | ||
| + | # Inserire la scheda SIM nel blocca scheda SIM, facendo attenzione a farla scivolare dentro le due linguette metalliche. Assicurarsi che i contatti metallici siano rivolti verso il basso e l'angolo tagliato sia rivolto verso la presa dell'antenna GPS esterna. | ||
| + | # Chiudere il blocca scheda SIM e assicurarlo facendo scivolare la parte metallica in direzione della presa per l'antenna GPS esterna del Neo FreeRunner. | ||
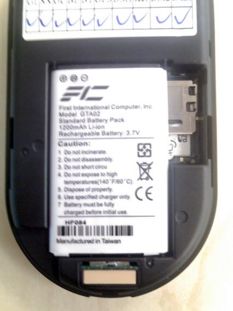
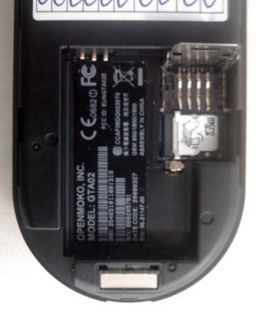
| + | # Inserire la batteria nell'apposito alloggiamento, allineando i contatti elettrici della batteria con quelli del dispositivo. Inserire prima il lato con i contatti elettrici. | ||
| + | # Reinserire la cover posteriore del Neo FreeRunner. | ||
| − | + | [[Image:FR_SIM_SD_open.jpg|457px|thumb|Alloggiamenti della SIM e della SD aperti, con rispettive schede in sede|center]] | |
| − | + | ||
| − | + | ||
| − | + | ||
| − | + | ||
| − | + | ||
| − | + | ||
| − | + | ||
| − | + | ||
| − | + | ||
| − | + | ||
| − | === | + | === Ricaricare il Neo FreeRunner === |
| + | Per un corretto caricamento della batteria del Neo FreeRunner, durante il primo processo di carica, si consiglia di portarlo a termine completamente. La batteria può essere caricata con il caricatore fornito (a 1000mA) o con una porta USB che abbia la capacità di fornire 500mA di corrente. La maggior parte dei computer sarà in grado di caricare il Neo FreeRunner senza problemi. | ||
| − | + | Caricando a 100mA ci vorranno 6-12 ore, invece a 500mA ci vorrà 1-2 ore. ([http://openmoko.togaware.com/survivor/Charging.html openmoko.togaware.com]) | |
| − | + | ===I pulsanti=== | |
| + | ====Power==== | ||
| + | Premendo il pulsante Power si uscirà dall'applicazione corrente. | ||
| − | + | Tenendo premuto il pulsante Power invece apparirà un menù che vi permetterà di accendere e spegnere il GSP, WIFI, GSM, l'antenna Bluetooth, e anche spegnere il Neo FreeRunner. | |
| + | |||
| + | ==== Aux ==== | ||
| + | Premendo per un secondo il pulsante Aux apparirà un menù che vi permetterà di: | ||
| + | * Attivare lo schermo intero: per nascondere o mostrare la barra del titolo | ||
| + | * Cambio di orientamento: ruota il contenuto dello schermo per la visualizzazione verticale o orizzontale | ||
| + | * Screenshot: parte un'applicazione che permette di catturare e salvare un'immagine del contenuto dello schermo | ||
| + | |||
| + | === Password === | ||
| + | L'utente root di default non ha password. Per metterne una è sufficiente digitare nel terminale: | ||
| + | # passwd | ||
| + | La password sarà inserita, in forma criptata, nel file <tt>/etc/passwd</tt>. | ||
| + | |||
| + | === Dare un nome al neonato === | ||
| + | Se l'hostname <tt>om-gta02</tt> non ci soddisfa, lo possiamo cambiare andando ad editare il file di configurazione in questione con | ||
| + | # vi /etc/hostname | ||
=== Sbloccare lo Schermo === | === Sbloccare lo Schermo === | ||
| + | Quando lo schermo è bloccato, vedrai una grafica verde in stile Matrix con il simbolo di Openmoko nel centro della parte bassa dello schermo, assieme al simbolo di ''bloccato'' e ''sbloccato''. Se si trascina il simbolo di Openmoko fino alla cima dello schermo, verso il simbolo di ''sbloccato'', si sbloccherà lo schermo. | ||
| + | |||
| + | ===Menu e Applicazioni=== | ||
| + | |||
| + | ''Nota:'' questa sezione descrive l'interfaccia utilizzata dall'immagine "2007.2", che è correntemente l'immagine predefinita Openmoko. | ||
| + | |||
| + | ==== Schermata Oggi ==== | ||
| + | [[Image:Todaypage_reduced_false.png|right|200px|]] | ||
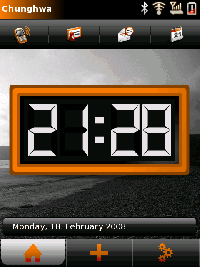
| + | La prima cosa che vi apparirà dopo aver fatto partire l'Openmoko è la pagina "Oggi". Questa è la vostra pagina principale. Sulla riga in alto, troverete le icone che indicano lo stato del vostro telefono. In seconda riga ci sono dei collegamenti alle applicazioni più usate, come il tastierino numerico per le chiamate. Il corpo principale della schermata è la vostra schermata principale, con un orologio in mezzo e con altre informazioni utili. La riga in basso è composta da tre linguette che rappresentano le schermate Oggi (quella che stiamo visualizzando ora), schermata di Avvio delle Applicazioni e la schermata dei Processi in Esecuzione. | ||
| + | |||
| + | Si veda [[Today/2007.2/it]] per maggiori informazioni a riguardo della schermata Oggi e sulla sua personalizzazione. | ||
| + | |||
| + | ====Schermata per l'Avvio delle Applicazione==== | ||
| + | |||
| + | {{stub}} | ||
| + | |||
| + | Questa schermata mostra una lista delle applicazioni avviabili. Puoi scegliere se far mostrare le categorie di software per semplificare la visualizzazione, oppure visualizzarle tutte. | ||
| + | |||
| + | Le categorie attualmente disponibili sono [[PIM Suite]], [[Application]], [[Games]], [[Utilities]], and All. | ||
| + | |||
| + | ====Schermata dei Processi in Esecuzione==== | ||
| + | |||
| + | {{stub}} | ||
| + | |||
| + | Mostra le applicazioni correntemente in esecuzione. Ogni singolo processo può essere terminato, selezionandolo e cliccando sull'icona del "Cestino". Si possono terminare tutti i processi, selezionadone uno e poi cliccando sull'icona della "Cartella" (aspettatevi un cambiamento nelle versioni future). Tutti i processi possono essere riavviati selezionandoli e cliccando sull'icona di "Ritorna" in mezzo in alto. | ||
| + | |||
| + | ====Uscire da un'Applicazione==== | ||
| + | |||
| + | In qualsiasi momento si può uscire da un'applicazione in esecuzione, cliccando sul bottone Power del dispositivo, così ritornando alla schermata Oggi. | ||
| + | |||
| + | Alternativamente, si può saltare ad un'altra applicazione, cliccando sul menu dei processi nell'angolo in alto a sinistra dello schermo, che vi mostrerà la lista dei processi in esecuzione permettendoti di sceglierne uno. | ||
| + | |||
| + | (''Nota:'' Se il menu dei processi non viene mostrato, usare il bottone [[#Aux|Aux]] per far apparire il menu Aux, dove selezionerete "Lascia schermo intero".) | ||
| + | |||
| + | ===Regolare il Volume=== | ||
| + | |||
| + | Nel momento in cui scriviamo, non esiste modo di regolare il volume dallo schermo. | ||
| + | |||
| + | Per ora dovete lanciare il Terminale o effettuare il [[Getting_Started_with_your_Neo_FreeRunner#Connect_to_the_Neo_FreeRunner_By_USB_Networking|log in via usb]], e avviare l'applicazione [[Neo_alsamixer|alsamixer]]. Il mixer è più semplice di quel che sembra. Basta muoversi con i tasti direzionali destra e sinistra per selezionare "headphone" (cuffie) o "PCM", ed utilizzare i tasti direzionali su e giu per regolare il volume. Si può anche regolare il microfono con la regolazione di "mic2". Premere poi ESC quando finito. A questo punto chiudere il Terminale o fare logout dal login USB. | ||
| + | |||
| + | Dovrai aggiornare i file di configurazione in /usr/share/openmoko/scenarios/ per rendere le regolazione del microfono permanenti. Per fare ciò, usa | ||
| + | alsactl -f ''path-to-statefile'' store | ||
| + | |||
| + | === Accedere alla scheda Micro-SD === | ||
| + | |||
| + | Questa è montata in /media/card | ||
| + | |||
| + | === Importare i contatti=== | ||
| + | |||
| + | Se puoi esportare i tuoi contatti nel formato VCard, sia in file multipli, sia in un unico file che li contiene tutti, puoi usare lo script della schermata [[Import Vcf Contacts]] per portarli tutti sul Neo FreeRunner. | ||
| + | |||
| + | === Dove andare quando le cosa vanno male === | ||
| − | + | Puoi chiedere aiuto sulla mailing list di supporto: maggiori informazioni su https://lists.openmoko.org/mailman/listinfo/support | |
| − | + | [[FreeRunner_Hardware_Issues]] | |
| − | + | == Connettere il Neo FreeRunner alla Rete via USB == | |
| + | Connettere il Neo FreeRunner a un computer GNU/Linux con il cavo USB. Per fare questo con Mac OS X, riferitevi a [[MacOS_X]]; invece per fare ciò con Windows XP e Vista, riferitevi a [[Neo1973_and_Windows]] (che funziona anche per il Neo FreeRunner). Dopo il boot nell'immagine di Openmoko avrete una nuova interfaccia, usb0, sul vostro computer GNU/Linux. | ||
===== Metodo Manuale ===== | ===== Metodo Manuale ===== | ||
| − | + | Digitare i seguenti comandi in un terminale GNU/Linux: | |
| − | + | ifconfig usb0 192.168.0.200 netmask 255.255.255.0 | |
| − | + | ssh root@192.168.0.202 | |
| − | + | Premere Invio per inserire la password. | |
===== Metodo Automatico ===== | ===== Metodo Automatico ===== | ||
| − | *Debian | + | *Debian e derivate (Ubuntu, Sidux etc.) |
| − | + | Modificare il file /etc/network/interfaces: | |
| − | + | auto usb0 | |
| − | + | iface usb0 inet static | |
| − | + | address 192.168.0.200 | |
| − | + | netmask 255.255.255.0 | |
| − | *Gentoo | + | *Gentoo |
| − | + | Modificare il file /etc/conf.d/net: | |
| − | + | config_usb0="192.168.0.200/24" | |
| − | + | Riavviare i servizi di rete('/etc/init.d/networking restart' per i sistemi basati su Debian) e quindi digitare i seguenti comandi in un terminale GNU/Linux: | |
| − | + | ssh root@192.168.0.202 | |
| − | + | Premere Invio per inserire la password. | |
{{note| | {{note| | ||
| − | + | Se il tuo dispositivo di rete sta usando un intervallo di ip 192.168.0.x dovrai usare il seguente comando prima di poterti connettere: | |
| − | + | route add -host 192.168.0.202 dev usb0 }} | |
===== Automatizzare ancora di più le operazioni ===== | ===== Automatizzare ancora di più le operazioni ===== | ||
| − | + | Se non vuoi doverti ricordare l'indirizzo ip del tuo telefono, puoi creare un alias aggiungerndo la seguente riga nel file /etc/hosts: | |
| − | + | 192.168.0.202 openmoko | |
| − | + | Ora sarà possibile connettersi al proprio telefono usando il seguente comando: | |
| − | + | ssh root@openmoko | |
| − | + | Il comando precedente ti fornisce solamente una connessione con una Shell sicura con il tuo dispositivo Openmoko, non ti permette di collegare il tuo dispositivo a Internet. Se ti interessa collegare il tuo dispositivo a Internet leggi alla sezione [[USB_Networking]]. | |
===== Condividere la tua connessione ad Internet via USB ===== | ===== Condividere la tua connessione ad Internet via USB ===== | ||
| + | Per accedere a internet con il Neo FreeRunner attraverso una connesione USB, avrai bisogno di fare alcune modifiche al PC attraverso cui ci si sta connettendo. | ||
| + | |||
In Ubuntu: | In Ubuntu: | ||
| − | + | Dentro al file /etc/network/interfaces, la configurazione dell'interfaccia in questo modo: | |
| + | |||
| + | auto usb0 | ||
| + | iface usb0 inet static | ||
| + | address 192.168.0.200 | ||
| + | netmask 255.255.255.0 | ||
| + | network 192.168.0.0 | ||
| + | up iptables -A POSTROUTING -t nat -j MASQUERADE -s 192.168.0.0/24 & | ||
| + | up echo 1 > /proc/sys/net/ipv4/ip_forward & | ||
| + | up iptables -P FORWARD ACCEPT & | ||
| + | down iptables -D POSTROUTING -t nat -j MASQUERADE -s 192.168.0.0/24 & | ||
| + | |||
| + | In Fedora: | ||
| + | |||
| + | Setta /etc/sysconfig/network-scripts/ifcfg-usb0 così: | ||
| + | DEVICE=usb0 | ||
| + | IPADDR=192.168.0.200 | ||
| + | NETMASK=255.255.255.0 | ||
| + | |||
| + | Setta /etc/sysconfig/network-scripts/ifup-usb così: | ||
| + | #!/bin/bash | ||
| + | |||
| + | . /etc/init.d/functions | ||
| + | |||
| + | cd /etc/sysconfig/network-scripts | ||
| + | . ./network-functions | ||
| + | |||
| + | [ -f ../network ] && . ../network | ||
| + | |||
| + | CONFIG=${1} | ||
| + | |||
| + | need_config ${CONFIG} | ||
| + | |||
| + | source_config | ||
| + | |||
| + | NETBITS=`ipcalc -p ${IPADDR} ${NETMASK} | awk -F'=' '{print $2;}'` | ||
| + | |||
| + | /sbin/ip addr flush dev ${DEVICE} 2>/dev/null | ||
| + | /sbin/ip link set dev ${DEVICE} up | ||
| + | /sbin/ip addr add dev ${DEVICE} ${IPADDR}/${NETBITS} | ||
| + | |||
| + | /sbin/iptables -I POSTROUTING -t nat -j MASQUERADE -s ${IPADDR}/${NETBITS} | ||
| + | /sbin/sysctl net.ipv4.ip_forward=1 | ||
| + | /sbin/iptables -I FORWARD -s ${IPADDR}/${NETBITS} -j ACCEPT | ||
| + | /sbin/iptables -I FORWARD -d ${IPADDR}/${NETBITS} -j ACCEPT | ||
| + | |||
| + | Setta /etc/sysconfig/network-scripts/ifdown-usb così: | ||
| + | #!/bin/bash | ||
| + | |||
| + | . /etc/init.d/functions | ||
| + | |||
| + | cd /etc/sysconfig/network-scripts | ||
| + | . ./network-functions | ||
| + | |||
| + | [ -f ../network ] && . ../network | ||
| + | |||
| + | CONFIG=${1} | ||
| + | |||
| + | need_config ${CONFIG} | ||
| + | |||
| + | source_config | ||
| + | |||
| + | NETBITS=`ipcalc -p ${IPADDR} ${NETMASK} | awk -F'=' '{print $2;}'` | ||
| + | |||
| + | /sbin/iptables -D FORWARD -d ${IPADDR}/${NETBITS} -j ACCEPT | ||
| + | /sbin/iptables -D FORWARD -s ${IPADDR}/${NETBITS} -j ACCEPT | ||
| + | /sbin/sysctl net.ipv4.ip_forward=0 | ||
| + | /sbin/iptables -D POSTROUTING -t nat -j MASQUERADE -s ${IPADDR}/${NETBITS} | ||
| + | |||
| + | /sbin/ip link set dev ${DEVICE} down | ||
| + | /sbin/ip addr flush dev ${DEVICE} 2>/dev/null | ||
| + | |||
| + | Se stai utilizzanto il NetworkManger, riavvialo e attiva il dispositivo USB dal suo menù, altrimenti disabiliterà la tua connessione dopo che l'avrai attivata. | ||
| + | /sbin/service NetworkManager restart | ||
| + | |||
| + | =====Aggiornare il DNS===== | ||
| + | |||
| + | Una volta che il tuo PC è configurato, modifica /etc/network/interfaces sul tuo Neo FreeRunner e cambia il codice da così: | ||
| + | |||
| + | iface usb0 inet static | ||
| + | address 192.168.0.202 | ||
| + | netmask 255.255.255.0 | ||
| + | network 192.168.0.0 | ||
| + | gateway 192.168.0.200 | ||
| + | up echo nameserver 192.168.0.200 > /etc/resolv.conf | ||
| + | |||
| + | a qualcosa che punti al nome reale del server, come un sistema publico DNS da OpenDNS, come questo: | ||
| + | |||
| + | iface usb0 inet static | ||
| + | address 192.168.0.202 | ||
| + | netmask 255.255.255.0 | ||
| + | network 192.168.0.0 | ||
| + | gateway 192.168.0.200 | ||
| + | up echo nameserver 208.67.222.222 > /etc/resolv.conf | ||
| + | up echo nameserver 208.67.220.220 >> /etc/resolv.conf | ||
| + | |||
| + | Nota: ''vi'' sembra che sia l'unico editor di testo disponibile di default. Vedi [http://www.cs.colostate.edu/helpdocs/vi.html basic vi commands] per l'aiuto. | ||
| + | |||
| + | Nell'immagine caricata di fabbrica OM2007.2, digita quanto segue per riavviare la rete, per far si che le modifiche al DNS abbiano effetto: | ||
| + | |||
| + | /etc/rc0.d/K40networking restart | ||
| + | |||
| + | Se continui a non essere in grado di andare su internet con il tuo Neo FreeRunner, e stai usando Mandriva e/o hai la tua LAN su 192.168.0.0/24, [[User:Linuxpaul|questa pagina]] dovrebbe aiutarti. | ||
| + | |||
| + | ==L'Architettura== | ||
| + | |||
| + | Tre livelli compongono il software del Neo FreeRunner: | ||
| + | |||
| + | ===U-Boot=== | ||
| + | |||
| + | Pensate a U-Boot come una combinazione tra il BIOS e Grub su un Pc. | ||
| + | |||
| + | ===Kernel=== | ||
| + | |||
| + | Il kernel Linux. | ||
| + | |||
| + | ===Filesystem Root=== | ||
| + | |||
| + | Il resto del sistema. | ||
| + | |||
| + | == Aggiornare il software == | ||
| + | Per aggiornare il Neo FreeRunner con le ultime novità e correzioni di sicurezza, ed è preferibile aggiornarlo periodicamente. Sono due i metodi principali per farlo: | ||
| + | |||
| + | === opkg === | ||
| + | Dando per scontato che il vostro Neo FreeRunner possa accedere a internet (nel caso guarda sopra), si può aggiornare il kernel e gli altri pacchetti con: | ||
| + | |||
| + | # opkg update | ||
| + | # opkg upgrade | ||
| + | |||
| + | Il primo comando aggiorna le informazioni sui repository, dicendo a opkg quali pacchetti sono disponibili. La seconda istruzione aggiorna i pacchetti per cui è disponibile una versione aggiornata. Al momento mancano alcune firme su alcuni file, per cui opkg si lamenterà un pò, ma nulla di importante. | ||
| + | |||
| + | In un futuro sarà anche possibile aggiornare U-Boot con opkg, ma per ora non è ancora stata implementata. | ||
| + | |||
| + | ==== Problemi frequenti ==== | ||
| + | Quando lancerete ''opkg update'' dovreste vedere | ||
| − | + | <nowiki> Downloading http://buildhost.openmoko.org/daily-feed/all/Packages.gz | |
| − | + | 100% |========================================================================| | |
| − | + | Inflating http://buildhost.openmoko.org/daily-feed/all/Packages.gz | |
| − | + | Updated list of available packages in /var/lib/opkg/daily-all</nowiki> | |
| − | + | e così via. | |
| − | + | ||
| − | + | ||
| − | + | ||
| − | + | ||
| − | + | Se vedi | |
| − | + | ||
| − | + | <nowiki> Downloading http://buildhost.openmoko.org/daily-feed/all/Packages.gz | |
| − | + | Downloading http://buildhost.openmoko.org/daily-feed/all/Packages.sig | |
| − | + | Signature check failed</nowiki> | |
| − | + | allora il download è fallito. Guarda [[Network Troubleshooting]] per maggiori informazioni. | |
| − | + | ||
| − | + | ||
| − | + | === Flashing === | |
| + | U-Boot, il kernel e il filesystem root possono essere aggiornati, scrivento sulla memeoria Flash direttamente (''flashare''). Per U-Boot è anche l'unica possibilità. Il vantaggio di flashare il kernel direttamente, anzichè aggiornarlo da opkg pare sia solo la velocità. | ||
| − | + | Lo svantaggio di flashare il filesystem root è che cancella tutte le modifiche locali, compresa la /home. Se però la vostra /home è sopra la memoria Micro-SD, questo non è più un problema. | |
| − | + | ||
| − | + | ||
| − | + | ||
| − | + | ||
| − | + | ||
| − | + | ||
== Modifiche all'immagine 2007.2 == | == Modifiche all'immagine 2007.2 == | ||
| + | L'immagine standard [[Openmoko2007.2]] inserita nei Neo FreeRunner dopo la loro produzione è solo essenziale. Ad esempio non è mostrato l'orologio e le icone. Così è come potete cambiarli: | ||
| − | + | # dbus-launch gconftool-2 -t boolean -s /desktop/poky/interface/reduced false | |
| + | # /etc/init.d/xserver-nodm restart | ||
| − | + | Se avete un orologio analogico anziché quello digitale, fate così: | |
| − | + | ||
| − | + | # dbus-launch gconftool-2 -t boolean -s /desktop/poky/interface/reduced false | |
| + | # dbus-launch gconftool-2 -t boolean -s /desktop/poky/interface/digital_clock false | ||
| + | # /etc/init.d/xserver-nodm restart | ||
| − | |||
| − | |||
| − | |||
| − | + | Altre informazioni su come aggiornare la schermata Oggi leggere [[Today/2007.2]]. | |
| − | + | Con gli entrambi orologi, vorrete impostare il corretto [[Fuso orario]]. | |
| − | + | E se preferite avere una tastiera completa, vedere [http://www.ginguppin.de/node/15 these instructions]. | |
| − | + | ===GPS=== | |
| − | + | Il modo più semplice per fare funzionare il GPS è: | |
| − | + | # opkg install gpsd | |
| − | + | sul Neo FreeRunner, | |
| − | + | ||
| − | + | ||
| − | + | # echo "GPS_DEV=\"/dev/ttySAC1\"" > /etc/default/gpsd | |
| − | + | e riavviare gpsd, il demone del gps, con | |
| − | + | # /etc/init.d/gpsd restart | |
| − | + | Per testare il GPS, potete usare agpsui: | |
| − | + | # opkg install openmoko-agpsui | |
| − | + | Per una bella mappa, provate tangoGPS: | |
| − | + | # opkg install tangogps | |
| − | + | === GPRS === | |
| − | + | Vedere [[Manually using GPRS]]. Stando ad alcune [http://lists.openmoko.org/pipermail/support/2008-July/000003.html notizie], il GPRS non è funzionante ora (2007.2). Ogni novità è però benvenuta. | |
| − | + | === WLAN === | |
| − | + | Vedere [[GTA02 WLAN]]. | |
| − | + | ===Software consigliato=== | |
| − | + | Se rivolete il Media Player: | |
| + | # opkg install openmoko-mediaplayer2 | ||
| + | # wget http://abraxa.dyndns.org:81/random/openmoko-mediaplayer-theme.tar.bz2 | ||
| + | # tar xjf openmoko-mediaplayer-theme.tar.bz2 -C /usr/share/themes/Moko/gtk-2.0 | ||
| + | # rm openmoko-mediaplayer-theme.tar.bz2 | ||
| + | |||
| + | Se volete una basilare visualizzatore di immagini, date un occhio a quello della suite GPE: | ||
| + | |||
| + | # opkg install gpe-icons gpe-gallery | ||
| + | |||
| + | Il browser web: | ||
| + | |||
| + | # opkg install openmoko-browser2 | ||
| + | |||
| + | Per installare un browser alternativo, ''Minimo'', che offre altre diverse funzionalità, dobbiamo prima scaricare e scompattare su un sistema GNU/Linux l'archivio: | ||
| + | |||
| + | # wget http://www.ginguppin.de/files/minimo.tar.bz2 | ||
| + | # tar jvxf minimo.tar.bz2 | ||
| + | |||
| + | poi copiarlo sul Neo FreeRunner: | ||
| + | # scp minimo_* root@openmoko:/tmp | ||
| + | |||
| + | Quindi sul Neo FreeRunner digitare: | ||
| + | # opkg install /tmp/minimo_0.02\+cvs20070626-r0_armv4t.ipk | ||
| + | |||
| + | Ci sono un mucchio di applicazioni che potete installare. Controllate i [[Repositories]] per una lista dei pacchetti. | ||
| + | |||
| + | == Effettuare il Boot sul Neo FreeRunner == | ||
| + | Potete avviare il vostro Neo FreeRunner nei seguenti modi: | ||
| + | |||
| + | : [[Image:Circle2.gif|10px]] Potete avviarlo direttamente nell'immagine Openmoko. | ||
| + | |||
| + | : [[Image:Circle2.gif|10px]] Potete avviarlo nel [[Bootloader|U-Boot]] via [[NAND Flash]]. | ||
| + | |||
| + | : [[Image:Circle2.gif|10px]] Potete avviarlo nel U-Boot via NOR Flash. | ||
| + | |||
| + | Avviando il dispositivo nelle memorie Flash NAND e NOR vi permette di aggiornare il kernel e il filesystem root. | ||
| + | |||
| + | === Avviare l'immagine Openmoko === | ||
<div align-center> | <div align-center> | ||
<table width="100%" style="clear: both; border: 1px solid #ffffff; border-collapse: collapse; padding: 0.2em; margin: 0; font-size: 100%; margin: 0 1px;"> | <table width="100%" style="clear: both; border: 1px solid #ffffff; border-collapse: collapse; padding: 0.2em; margin: 0; font-size: 100%; margin: 0 1px;"> | ||
| Line 226: | Line 456: | ||
</td> | </td> | ||
<td style="width: 10px; white-space: nowrap; padding: 4px 1em 0 0.5em; border-right: 1px solid #ffffff;">[[Image:Menu2.jpg|200px|right|thumb]]</td><td style="padding: 1px 1em 0; background: #eeeeee;"> | <td style="width: 10px; white-space: nowrap; padding: 4px 1em 0 0.5em; border-right: 1px solid #ffffff;">[[Image:Menu2.jpg|200px|right|thumb]]</td><td style="padding: 1px 1em 0; background: #eeeeee;"> | ||
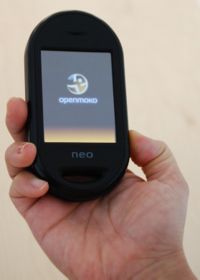
| − | + | Mantenere premuto il bottone Power per circa 8 secondi, fino a quando apparirà la schermata di avvio di Openmoko. Potrete lasciare il bottone Power e si continuerà ad avviare nell'immagine Openmoko. | |
</td></tr></table> | </td></tr></table> | ||
</div> | </div> | ||
| − | === | + | === Entrare nell'U-Boot nella NAND Flash === |
| − | + | ||
<div align-center> | <div align-center> | ||
<table width="100%" style="clear: both; border: 1px solid #ffffff; border-collapse: collapse; padding: 0.2em; margin: 0; font-size: 100%; margin: 0 1px;"> | <table width="100%" style="clear: both; border: 1px solid #ffffff; border-collapse: collapse; padding: 0.2em; margin: 0; font-size: 100%; margin: 0 1px;"> | ||
| Line 240: | Line 469: | ||
</td> | </td> | ||
<td style="width: 10px; white-space: nowrap; padding: 4px 1em 0 0.5em; border-right: 1px solid #ffffff;">[[Image:Menu7.jpg|200px|right|thumb]]</td><td style="padding: 1px 1em 0; background: #eeeeee;"> | <td style="width: 10px; white-space: nowrap; padding: 4px 1em 0 0.5em; border-right: 1px solid #ffffff;">[[Image:Menu7.jpg|200px|right|thumb]]</td><td style="padding: 1px 1em 0; background: #eeeeee;"> | ||
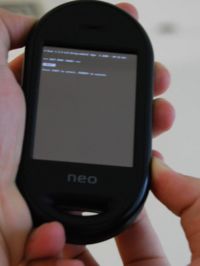
| − | + | Premere e mantenere premuto il bottone Power e poi il bottone AUX per circa 5-8 secondi. Dovrebbe apparire il menu per il boot della Flash NAND. Premere il bottone AUX per selezionare una delle opzioni e poi premi il bottone Power per procedere. | |
</td></tr></table> | </td></tr></table> | ||
</div> | </div> | ||
| − | === | + | === Entrare nell'U-Boot nella NOR Flash === |
| − | + | ||
<div align-center> | <div align-center> | ||
<table width="100%" style="clear: both; border: 1px solid #ffffff; border-collapse: collapse; padding: 0.2em; margin: 0; font-size: 100%; margin: 0 1px;"> | <table width="100%" style="clear: both; border: 1px solid #ffffff; border-collapse: collapse; padding: 0.2em; margin: 0; font-size: 100%; margin: 0 1px;"> | ||
| Line 254: | Line 482: | ||
<td style="width: 10px; white-space: nowrap; padding: 4px 1em 0 0.5em; border-right: 1px solid #ffffff;">[[Image:Menu6.jpg|200px|right|thumb]]</td><td style="padding: 1px 1em 0; background: #eeeeee;"> | <td style="width: 10px; white-space: nowrap; padding: 4px 1em 0 0.5em; border-right: 1px solid #ffffff;">[[Image:Menu6.jpg|200px|right|thumb]]</td><td style="padding: 1px 1em 0; background: #eeeeee;"> | ||
| − | + | Premere e mantenere premuto il bottone AUX e poi il bottone Power. Quindi rilasciare il bottone AUX. Dovrebbe apparire il menu di boot della memoria Flash NOR. Questa opzione è usata solitamente dagli sviluppatori, o quando si aggiorna il FreeRunner. Se non si riesce ad entrare nell'U-Boot della NAND, si riuscirà comunque ad entrare il quello della memoria Flash NOR. | |
</td></tr></table> | </td></tr></table> | ||
</div> | </div> | ||
| − | {{note| | + | {{note| Ci sono sei opzioni quando si decide di entrare nella Flash NOR. |
1. Boot | 1. Boot | ||
| − | 2. [[Boot | + | 2. [[Boot dalla scheda SD|Boot dalla MicroSD]] |
| − | 3. | + | 3. Setta la console a USB |
| − | 4. | + | 4. Setta la console a Serial |
5. Reset | 5. Reset | ||
| − | 6. | + | 6. Spegni}} |
| − | {{note| | + | {{note| Il termine ''Entrare'' usato in questo contesto significa accendere il dispositivo con i metodi descritti, e portarlo al menu U-Boot. Per evitare il boot automatico del dispositivo, premere il bottone AUX per muovere la barra di selezione. Notare anche che il dispositivo ''non'' si spegnerà automaticamente durante la procedura di aggiornamento.}} |
| − | }} | + | |
| − | == | + | == Aggiornare il Neo FreeRunner == |
| − | + | Dato che Openmoko è in continuo sviluppo, Openmoko rilascia delle versioni aggiornate del filesystem root, del kernel e del [[Bootloader| U-Boot]]. Questi possono essere inseriti nella memoria Flash del Neo FreeRunner. Puoi usare il cavo USB e il programma forniti per aggiornare il tuo Neo FreeRunner. | |
| − | {{note| | + | {{note|L'Openmoko software team rilascia immagini del sistema aggiornate giornalmente. Se vuoi usare le ultime immagini, puoi scaricarle dal ''daily build'', ma noi raccomandiamo di usare l'immagine più stabile, scaricabile da http://downloads.openmoko.org/releases/. Le immagini presenti sono testate dal team di test. |
| − | + | Altre informazioni sull'immagine corrente: http://wiki.openmoko.org/wiki/Latest_Images}} | |
| − | ===Step1. | + | === Step1. Scaricare DFU-util === |
| + | Puoi scaricare il software per l'aggiornamento da: | ||
| + | http://downloads.openmoko.org/releases/Om2008.4/dfu-util | ||
| − | + | Su un sistema GNU/Linux puoi usare i seguenti programmi per scaricare ''dfu-util'': | |
| − | http://downloads.openmoko.org/releases/ | + | wget http://downloads.openmoko.org/releases/Om2008.4/dfu-util |
| − | + | Successivamente dovete cambiare i permessi al file: | |
| − | + | chmod a+x dfu-util | |
| − | + | === Step 2. Preparare il Neo FreeRunner=== | |
| − | + | ||
| − | + | Spegnere il FreeRunner se è acceso ed entrare nell'U-Boot della NOR Flash. Per svolgere l'aggiornamento il Neo FreeRunner ha bisogno di essere dentro l'U-Boot. | |
| − | + | [[Image:menu15.jpg|thumb|Entra nell'U-Boot della NOR Flash, connetti il tuo Neo con il sistema Linux attraverso il cavo USB]] | |
| − | + | ||
| − | + | Collegarlo al PC tramite cavo USB e dare il comando ./dfu-util -l | |
| − | + | ||
| + | Il comando restituirà una stringa simile a questa: | ||
| − | + | dfu-util - (C) 2007 by OpenMoko Inc. | |
| + | This program is Free Software and has ABSOLUTELY NO WARRANTY | ||
| − | + | Found Runtime: [0x1d50:0x5119] devnum=0, cfg=0, intf=2, alt=0, name="UNDEFINED" | |
| − | + | Annotare il valore compreso fra le parentesi quadre, qualcosa del tipo ??????:?????? | |
| − | + | ||
| − | + | ||
| − | + | ||
| − | + | ||
| − | + | === Step 3. Aggiornare il Kernel === | |
| + | Puoi scaricare il kernel da http://downloads.openmoko.org/releases/ | ||
| + | |||
| + | I file del kernel sono quelli che contengono la dicitura <b>uImage</b> | ||
| + | |||
| + | Digita i seguenti comandi su un sistema GNU/Linux. In alcuni sistemi bisogna essere l'utente root prima di fare questo lavoro. | ||
| + | |||
| + | ./dfu-util -d (valore annotato precedentemente) -a kernel -R -D (nome del file dell'immagine scaricato precedentemente). | ||
| + | |||
| + | |||
| + | esempio: | ||
| + | |||
| + | ./dfu-util -d 0x1d50:0x5119 -a kernel -R -D Om2008.8.uImage.bin | ||
| + | |||
| + | |||
| + | Quando l'aggiornamento sarà completo, sul terminale del vostro PC verrà esposto il seguente messaggio: | ||
status(0) = No error condition is present<br> | status(0) = No error condition is present<br> | ||
Done! | Done! | ||
| − | |||
| − | |||
| − | {{note| | + | {{note| Il significato dei parametri che avete dato è: |
| − | -a --alt alt | + | -d Specifica quale dispositivo collegato al PC è il Neo FreeRunner |
| − | -R --reset | + | -a --alt alt Specifica ''l'altsetting'' dell'interfaccia DFU da un nome o da un numero<br> |
| − | -D --download file | + | -R --reset Resetta i problemi dell'USB segnalandoli una volta che abbiamo finito<br> |
| + | -D --download file Scrive il firmware specificato da <file> nel dispositivo<br> | ||
}} | }} | ||
| − | ===Step | + | === Step 4. Aggiornare il Filesystem Root === |
| − | + | Puoi scaricare il filesystem root da: | |
| − | http://downloads.openmoko.org/releases | + | http://downloads.openmoko.org/releases/ |
| − | + | I file contenenti il filesystem root sono quelli contenenti la dicitura <b>rootfs</b> | |
| − | + | Digita i seguenti comandi in un sistema GNU/Linux. Su alcuni sistemi bisogna essere l'utente root (amministratore). | |
| − | + | ./dfu-util -d (valore annotato precedentemente) -a rootfs -R -D (nome del file contenente il filesystem root) | |
| + | |||
| + | esempio: | ||
| + | |||
| + | ./dfu-util -d 0x1d50:0x5119 -a rootfs -R -D Om2008.8.rootfs.jffs2 | ||
| + | |||
| + | Quando l'aggiornamento sarà completo, sul terminale del vostro PC sarà mostrato il seguente messaggio: | ||
status(0) = No error condition is present<br> | status(0) = No error condition is present<br> | ||
| Line 338: | Line 582: | ||
== Appendice == | == Appendice == | ||
| − | + | Se ti interessa sapere altri riguardo il Neo FreeRunner allora puoi suguire questi argomenti: | |
| + | |||
* [[GTA02 Openness]] | * [[GTA02 Openness]] | ||
* [[Neo FreeRunner]] | * [[Neo FreeRunner]] | ||
* [[Neo FreeRunner GTA02 Hardware]] | * [[Neo FreeRunner GTA02 Hardware]] | ||
* [[FreeRunner/Buttons and LEDs]] | * [[FreeRunner/Buttons and LEDs]] | ||
| − | * [[ | + | * [[Latest Images]] |
* [[Distributions]] | * [[Distributions]] | ||
| − | [[Category: | + | Per cercare con Google su questo wiki scrivere quanto segue: |
| + | |||
| + | <search term> site:http://wiki.openmoko.org/wiki/ | ||
| + | |||
| + | Un ottimo tool per cercare nelle Openmoko mailing list è http://openmoko.markmail.org/ . | ||
| + | |||
| + | [[Category:Neo FreeRunner Hardware/it]] | ||
Latest revision as of 11:26, 12 January 2010
| Languages: |
English • العربية • Български • Česky • Dansk • Deutsch • Esperanto • Eesti • Español • فارسی • Suomi • Français • עברית • Magyar • Italiano • 한국어 • Nederlands • Norsk (bokmål) • Polski • Português • Română • Русский • Svenska • Slovenčina • Українська • 中文(中国大陆) • 中文(台灣) • Euskara • Català |
|
Grazie per aver comprato questa versione da Sviluppatori del Neo FreeRunner. Il telefono Neo FreeRunner è la seconda piattaforma hardware che sfrutta nativamente Openmoko/it. Questa guida ti aiuterà a conoscere il tuo Neo FreeRunner e ti indicherà come inizare ad usarlo. |
|---|
[edit] Contenuti della Confezione
[edit] Iniziare a Conoscere il Neo FreeRunner
[edit] Inserire la scheda Micro-SD, la SIM e la Batteria
- Rimuovere la cover posteriore del Neo FreeRunner tenendo il dispositivo per i lati e, con l'unghia, facendo leva nel taglio visibile nella parte superiore del dispositivo.
- Individuare il sistema che blocca la scheda SIM e la memoria Micro-SD, al fianco dello scomparto per la batteria.
- Sganciare il blocca scheda SIM facendo scivolare con l'unghia la parte metallica verso il basso (ovvero in direzione dell'entrata USB). Prestare attenzione durante l'operazione, poichè, data la delicatezza delle parti esse potrebbero rimanere danneggiate se forzate nella direzione sbagliata.
- Sollevare il blocca scheda SIM.
- La memoria Micro-SD è bloccata da due fermagli su ambo i lati. Per una maggiore sicurezza, sarà possibile aprire l'alloggiamento per la Micro-SD sbloccando i fermagli uno alla volta, anziché tirando dal centro, poiché quest'ultima pratica tende ad aumentare la pressione sui fermagli laterali. Un cacciavite o un piccolo coltello possono aiutare in questa operazione.
- Inserire la memoria Micro-SD nell'apposito spazio. Assicurarsi che i contatti elettrici siano rivolti verso il basso e vicino al bordo del Neo FreeRunner.
- Chiudere il blocca scheda Micro-SD assicurandosi che entrambi i fermagli siano ben agganciati.
- Inserire la scheda SIM nel blocca scheda SIM, facendo attenzione a farla scivolare dentro le due linguette metalliche. Assicurarsi che i contatti metallici siano rivolti verso il basso e l'angolo tagliato sia rivolto verso la presa dell'antenna GPS esterna.
- Chiudere il blocca scheda SIM e assicurarlo facendo scivolare la parte metallica in direzione della presa per l'antenna GPS esterna del Neo FreeRunner.
- Inserire la batteria nell'apposito alloggiamento, allineando i contatti elettrici della batteria con quelli del dispositivo. Inserire prima il lato con i contatti elettrici.
- Reinserire la cover posteriore del Neo FreeRunner.
[edit] Ricaricare il Neo FreeRunner
Per un corretto caricamento della batteria del Neo FreeRunner, durante il primo processo di carica, si consiglia di portarlo a termine completamente. La batteria può essere caricata con il caricatore fornito (a 1000mA) o con una porta USB che abbia la capacità di fornire 500mA di corrente. La maggior parte dei computer sarà in grado di caricare il Neo FreeRunner senza problemi.
Caricando a 100mA ci vorranno 6-12 ore, invece a 500mA ci vorrà 1-2 ore. (openmoko.togaware.com)
[edit] I pulsanti
[edit] Power
Premendo il pulsante Power si uscirà dall'applicazione corrente.
Tenendo premuto il pulsante Power invece apparirà un menù che vi permetterà di accendere e spegnere il GSP, WIFI, GSM, l'antenna Bluetooth, e anche spegnere il Neo FreeRunner.
[edit] Aux
Premendo per un secondo il pulsante Aux apparirà un menù che vi permetterà di:
- Attivare lo schermo intero: per nascondere o mostrare la barra del titolo
- Cambio di orientamento: ruota il contenuto dello schermo per la visualizzazione verticale o orizzontale
- Screenshot: parte un'applicazione che permette di catturare e salvare un'immagine del contenuto dello schermo
[edit] Password
L'utente root di default non ha password. Per metterne una è sufficiente digitare nel terminale:
- passwd
La password sarà inserita, in forma criptata, nel file /etc/passwd.
[edit] Dare un nome al neonato
Se l'hostname om-gta02 non ci soddisfa, lo possiamo cambiare andando ad editare il file di configurazione in questione con
- vi /etc/hostname
[edit] Sbloccare lo Schermo
Quando lo schermo è bloccato, vedrai una grafica verde in stile Matrix con il simbolo di Openmoko nel centro della parte bassa dello schermo, assieme al simbolo di bloccato e sbloccato. Se si trascina il simbolo di Openmoko fino alla cima dello schermo, verso il simbolo di sbloccato, si sbloccherà lo schermo.
[edit] Menu e Applicazioni
Nota: questa sezione descrive l'interfaccia utilizzata dall'immagine "2007.2", che è correntemente l'immagine predefinita Openmoko.
[edit] Schermata Oggi
La prima cosa che vi apparirà dopo aver fatto partire l'Openmoko è la pagina "Oggi". Questa è la vostra pagina principale. Sulla riga in alto, troverete le icone che indicano lo stato del vostro telefono. In seconda riga ci sono dei collegamenti alle applicazioni più usate, come il tastierino numerico per le chiamate. Il corpo principale della schermata è la vostra schermata principale, con un orologio in mezzo e con altre informazioni utili. La riga in basso è composta da tre linguette che rappresentano le schermate Oggi (quella che stiamo visualizzando ora), schermata di Avvio delle Applicazioni e la schermata dei Processi in Esecuzione.
Si veda Today/2007.2/it per maggiori informazioni a riguardo della schermata Oggi e sulla sua personalizzazione.
[edit] Schermata per l'Avvio delle Applicazione
| Stub: This is a stub. You can help OpenMokoWiki by expanding it. |
Questa schermata mostra una lista delle applicazioni avviabili. Puoi scegliere se far mostrare le categorie di software per semplificare la visualizzazione, oppure visualizzarle tutte.
Le categorie attualmente disponibili sono PIM Suite, Application, Games, Utilities, and All.
[edit] Schermata dei Processi in Esecuzione
| Stub: This is a stub. You can help OpenMokoWiki by expanding it. |
Mostra le applicazioni correntemente in esecuzione. Ogni singolo processo può essere terminato, selezionandolo e cliccando sull'icona del "Cestino". Si possono terminare tutti i processi, selezionadone uno e poi cliccando sull'icona della "Cartella" (aspettatevi un cambiamento nelle versioni future). Tutti i processi possono essere riavviati selezionandoli e cliccando sull'icona di "Ritorna" in mezzo in alto.
[edit] Uscire da un'Applicazione
In qualsiasi momento si può uscire da un'applicazione in esecuzione, cliccando sul bottone Power del dispositivo, così ritornando alla schermata Oggi.
Alternativamente, si può saltare ad un'altra applicazione, cliccando sul menu dei processi nell'angolo in alto a sinistra dello schermo, che vi mostrerà la lista dei processi in esecuzione permettendoti di sceglierne uno.
(Nota: Se il menu dei processi non viene mostrato, usare il bottone Aux per far apparire il menu Aux, dove selezionerete "Lascia schermo intero".)
[edit] Regolare il Volume
Nel momento in cui scriviamo, non esiste modo di regolare il volume dallo schermo.
Per ora dovete lanciare il Terminale o effettuare il log in via usb, e avviare l'applicazione alsamixer. Il mixer è più semplice di quel che sembra. Basta muoversi con i tasti direzionali destra e sinistra per selezionare "headphone" (cuffie) o "PCM", ed utilizzare i tasti direzionali su e giu per regolare il volume. Si può anche regolare il microfono con la regolazione di "mic2". Premere poi ESC quando finito. A questo punto chiudere il Terminale o fare logout dal login USB.
Dovrai aggiornare i file di configurazione in /usr/share/openmoko/scenarios/ per rendere le regolazione del microfono permanenti. Per fare ciò, usa alsactl -f path-to-statefile store
[edit] Accedere alla scheda Micro-SD
Questa è montata in /media/card
[edit] Importare i contatti
Se puoi esportare i tuoi contatti nel formato VCard, sia in file multipli, sia in un unico file che li contiene tutti, puoi usare lo script della schermata Import Vcf Contacts per portarli tutti sul Neo FreeRunner.
[edit] Dove andare quando le cosa vanno male
Puoi chiedere aiuto sulla mailing list di supporto: maggiori informazioni su https://lists.openmoko.org/mailman/listinfo/support
[edit] Connettere il Neo FreeRunner alla Rete via USB
Connettere il Neo FreeRunner a un computer GNU/Linux con il cavo USB. Per fare questo con Mac OS X, riferitevi a MacOS_X; invece per fare ciò con Windows XP e Vista, riferitevi a Neo1973_and_Windows (che funziona anche per il Neo FreeRunner). Dopo il boot nell'immagine di Openmoko avrete una nuova interfaccia, usb0, sul vostro computer GNU/Linux.
[edit] Metodo Manuale
Digitare i seguenti comandi in un terminale GNU/Linux:
ifconfig usb0 192.168.0.200 netmask 255.255.255.0
ssh root@192.168.0.202
Premere Invio per inserire la password.
[edit] Metodo Automatico
- Debian e derivate (Ubuntu, Sidux etc.)
Modificare il file /etc/network/interfaces:
auto usb0
iface usb0 inet static
address 192.168.0.200
netmask 255.255.255.0
- Gentoo
Modificare il file /etc/conf.d/net:
config_usb0="192.168.0.200/24"
Riavviare i servizi di rete('/etc/init.d/networking restart' per i sistemi basati su Debian) e quindi digitare i seguenti comandi in un terminale GNU/Linux:
ssh root@192.168.0.202
Premere Invio per inserire la password.
| NOTE:
Se il tuo dispositivo di rete sta usando un intervallo di ip 192.168.0.x dovrai usare il seguente comando prima di poterti connettere: route add -host 192.168.0.202 dev usb0 |
[edit] Automatizzare ancora di più le operazioni
Se non vuoi doverti ricordare l'indirizzo ip del tuo telefono, puoi creare un alias aggiungerndo la seguente riga nel file /etc/hosts:
192.168.0.202 openmoko
Ora sarà possibile connettersi al proprio telefono usando il seguente comando:
ssh root@openmoko
Il comando precedente ti fornisce solamente una connessione con una Shell sicura con il tuo dispositivo Openmoko, non ti permette di collegare il tuo dispositivo a Internet. Se ti interessa collegare il tuo dispositivo a Internet leggi alla sezione USB_Networking.
[edit] Condividere la tua connessione ad Internet via USB
Per accedere a internet con il Neo FreeRunner attraverso una connesione USB, avrai bisogno di fare alcune modifiche al PC attraverso cui ci si sta connettendo.
In Ubuntu:
Dentro al file /etc/network/interfaces, la configurazione dell'interfaccia in questo modo:
auto usb0
iface usb0 inet static
   address 192.168.0.200
   netmask 255.255.255.0
   network 192.168.0.0
   up iptables -A POSTROUTING -t nat -j MASQUERADE -s 192.168.0.0/24 &
   up echo 1 > /proc/sys/net/ipv4/ip_forward &
   up iptables -P FORWARD ACCEPT &
   down iptables -D POSTROUTING -t nat -j MASQUERADE -s 192.168.0.0/24 &
In Fedora:
Setta /etc/sysconfig/network-scripts/ifcfg-usb0 così: DEVICE=usb0 IPADDR=192.168.0.200 NETMASK=255.255.255.0
Setta /etc/sysconfig/network-scripts/ifup-usb così:
- !/bin/bash
. /etc/init.d/functions
cd /etc/sysconfig/network-scripts . ./network-functions
[ -f ../network ] && . ../network
CONFIG=${1}
need_config ${CONFIG}
source_config
NETBITS=`ipcalc -p ${IPADDR} ${NETMASK} | awk -F'=' '{print $2;}'`
/sbin/ip addr flush dev ${DEVICE} 2>/dev/null /sbin/ip link set dev ${DEVICE} up /sbin/ip addr add dev ${DEVICE} ${IPADDR}/${NETBITS}
/sbin/iptables -I POSTROUTING -t nat -j MASQUERADE -s ${IPADDR}/${NETBITS} /sbin/sysctl net.ipv4.ip_forward=1 /sbin/iptables -I FORWARD -s ${IPADDR}/${NETBITS} -j ACCEPT /sbin/iptables -I FORWARD -d ${IPADDR}/${NETBITS} -j ACCEPT
Setta /etc/sysconfig/network-scripts/ifdown-usb così:
- !/bin/bash
. /etc/init.d/functions
cd /etc/sysconfig/network-scripts . ./network-functions
[ -f ../network ] && . ../network
CONFIG=${1}
need_config ${CONFIG}
source_config
NETBITS=`ipcalc -p ${IPADDR} ${NETMASK} | awk -F'=' '{print $2;}'`
/sbin/iptables -D FORWARD -d ${IPADDR}/${NETBITS} -j ACCEPT /sbin/iptables -D FORWARD -s ${IPADDR}/${NETBITS} -j ACCEPT /sbin/sysctl net.ipv4.ip_forward=0 /sbin/iptables -D POSTROUTING -t nat -j MASQUERADE -s ${IPADDR}/${NETBITS}
/sbin/ip link set dev ${DEVICE} down /sbin/ip addr flush dev ${DEVICE} 2>/dev/null
Se stai utilizzanto il NetworkManger, riavvialo e attiva il dispositivo USB dal suo menù, altrimenti disabiliterà la tua connessione dopo che l'avrai attivata. /sbin/service NetworkManager restart
[edit] Aggiornare il DNS
Una volta che il tuo PC è configurato, modifica /etc/network/interfaces sul tuo Neo FreeRunner e cambia il codice da così:
iface usb0 inet static
       address 192.168.0.202
       netmask 255.255.255.0
       network 192.168.0.0
       gateway 192.168.0.200
       up echo nameserver 192.168.0.200 > /etc/resolv.conf
a qualcosa che punti al nome reale del server, come un sistema publico DNS da OpenDNS, come questo:
iface usb0 inet static
       address 192.168.0.202
       netmask 255.255.255.0
       network 192.168.0.0
       gateway 192.168.0.200
       up echo nameserver 208.67.222.222 > /etc/resolv.conf
       up echo nameserver 208.67.220.220 >> /etc/resolv.conf
Nota: vi sembra che sia l'unico editor di testo disponibile di default. Vedi basic vi commands per l'aiuto.
Nell'immagine caricata di fabbrica OM2007.2, digita quanto segue per riavviare la rete, per far si che le modifiche al DNS abbiano effetto:
/etc/rc0.d/K40networking restart
Se continui a non essere in grado di andare su internet con il tuo Neo FreeRunner, e stai usando Mandriva e/o hai la tua LAN su 192.168.0.0/24, questa pagina dovrebbe aiutarti.
[edit] L'Architettura
Tre livelli compongono il software del Neo FreeRunner:
[edit] U-Boot
Pensate a U-Boot come una combinazione tra il BIOS e Grub su un Pc.
[edit] Kernel
Il kernel Linux.
[edit] Filesystem Root
Il resto del sistema.
[edit] Aggiornare il software
Per aggiornare il Neo FreeRunner con le ultime novità e correzioni di sicurezza, ed è preferibile aggiornarlo periodicamente. Sono due i metodi principali per farlo:
[edit] opkg
Dando per scontato che il vostro Neo FreeRunner possa accedere a internet (nel caso guarda sopra), si può aggiornare il kernel e gli altri pacchetti con:
- opkg update
- opkg upgrade
Il primo comando aggiorna le informazioni sui repository, dicendo a opkg quali pacchetti sono disponibili. La seconda istruzione aggiorna i pacchetti per cui è disponibile una versione aggiornata. Al momento mancano alcune firme su alcuni file, per cui opkg si lamenterà un pò, ma nulla di importante.
In un futuro sarà anche possibile aggiornare U-Boot con opkg, ma per ora non è ancora stata implementata.
[edit] Problemi frequenti
Quando lancerete opkg update dovreste vedere
Downloading http://buildhost.openmoko.org/daily-feed/all/Packages.gz 100% |========================================================================| Inflating http://buildhost.openmoko.org/daily-feed/all/Packages.gz Updated list of available packages in /var/lib/opkg/daily-all e così via.
Se vedi
Downloading http://buildhost.openmoko.org/daily-feed/all/Packages.gz Downloading http://buildhost.openmoko.org/daily-feed/all/Packages.sig Signature check failed allora il download è fallito. Guarda Network Troubleshooting per maggiori informazioni.
[edit] Flashing
U-Boot, il kernel e il filesystem root possono essere aggiornati, scrivento sulla memeoria Flash direttamente (flashare). Per U-Boot è anche l'unica possibilità. Il vantaggio di flashare il kernel direttamente, anzichè aggiornarlo da opkg pare sia solo la velocità.
Lo svantaggio di flashare il filesystem root è che cancella tutte le modifiche locali, compresa la /home. Se però la vostra /home è sopra la memoria Micro-SD, questo non è più un problema.
[edit] Modifiche all'immagine 2007.2
L'immagine standard Openmoko2007.2 inserita nei Neo FreeRunner dopo la loro produzione è solo essenziale. Ad esempio non è mostrato l'orologio e le icone. Così è come potete cambiarli:
- dbus-launch gconftool-2 -t boolean -s /desktop/poky/interface/reduced false
- /etc/init.d/xserver-nodm restart
Se avete un orologio analogico anziché quello digitale, fate così:
- dbus-launch gconftool-2 -t boolean -s /desktop/poky/interface/reduced false
- dbus-launch gconftool-2 -t boolean -s /desktop/poky/interface/digital_clock false
- /etc/init.d/xserver-nodm restart
Altre informazioni su come aggiornare la schermata Oggi leggere Today/2007.2.
Con gli entrambi orologi, vorrete impostare il corretto Fuso orario.
E se preferite avere una tastiera completa, vedere these instructions.
[edit] GPS
Il modo più semplice per fare funzionare il GPS è:
- opkg install gpsd
sul Neo FreeRunner,
- echo "GPS_DEV=\"/dev/ttySAC1\"" > /etc/default/gpsd
e riavviare gpsd, il demone del gps, con
- /etc/init.d/gpsd restart
Per testare il GPS, potete usare agpsui:
- opkg install openmoko-agpsui
Per una bella mappa, provate tangoGPS:
- opkg install tangogps
[edit] GPRS
Vedere Manually using GPRS. Stando ad alcune notizie, il GPRS non è funzionante ora (2007.2). Ogni novità è però benvenuta.
[edit] WLAN
Vedere GTA02 WLAN.
[edit] Software consigliato
Se rivolete il Media Player:
- opkg install openmoko-mediaplayer2
- wget http://abraxa.dyndns.org:81/random/openmoko-mediaplayer-theme.tar.bz2
- tar xjf openmoko-mediaplayer-theme.tar.bz2 -C /usr/share/themes/Moko/gtk-2.0
- rm openmoko-mediaplayer-theme.tar.bz2
Se volete una basilare visualizzatore di immagini, date un occhio a quello della suite GPE:
- opkg install gpe-icons gpe-gallery
Il browser web:
- opkg install openmoko-browser2
Per installare un browser alternativo, Minimo, che offre altre diverse funzionalità, dobbiamo prima scaricare e scompattare su un sistema GNU/Linux l'archivio:
- wget http://www.ginguppin.de/files/minimo.tar.bz2
- tar jvxf minimo.tar.bz2
poi copiarlo sul Neo FreeRunner:
- scp minimo_* root@openmoko:/tmp
Quindi sul Neo FreeRunner digitare:
- opkg install /tmp/minimo_0.02\+cvs20070626-r0_armv4t.ipk
Ci sono un mucchio di applicazioni che potete installare. Controllate i Repositories per una lista dei pacchetti.
[edit] Effettuare il Boot sul Neo FreeRunner
Potete avviare il vostro Neo FreeRunner nei seguenti modi:
-
 Potete avviarlo nel U-Boot via NAND Flash.
Avviando il dispositivo nelle memorie Flash NAND e NOR vi permette di aggiornare il kernel e il filesystem root.
[edit] Avviare l'immagine Openmoko
|
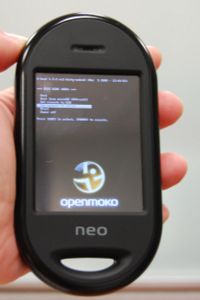
Mantenere premuto il bottone Power per circa 8 secondi, fino a quando apparirà la schermata di avvio di Openmoko. Potrete lasciare il bottone Power e si continuerà ad avviare nell'immagine Openmoko. |
[edit] Entrare nell'U-Boot nella NAND Flash
|
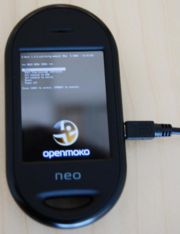
Premere e mantenere premuto il bottone Power e poi il bottone AUX per circa 5-8 secondi. Dovrebbe apparire il menu per il boot della Flash NAND. Premere il bottone AUX per selezionare una delle opzioni e poi premi il bottone Power per procedere. |
[edit] Entrare nell'U-Boot nella NOR Flash
|
Premere e mantenere premuto il bottone AUX e poi il bottone Power. Quindi rilasciare il bottone AUX. Dovrebbe apparire il menu di boot della memoria Flash NOR. Questa opzione è usata solitamente dagli sviluppatori, o quando si aggiorna il FreeRunner. Se non si riesce ad entrare nell'U-Boot della NAND, si riuscirà comunque ad entrare il quello della memoria Flash NOR. |
| NOTE: Ci sono sei opzioni quando si decide di entrare nella Flash NOR.
1. Boot 3. Setta la console a USB 4. Setta la console a Serial 5. Reset 6. Spegni |
| NOTE: Il termine Entrare usato in questo contesto significa accendere il dispositivo con i metodi descritti, e portarlo al menu U-Boot. Per evitare il boot automatico del dispositivo, premere il bottone AUX per muovere la barra di selezione. Notare anche che il dispositivo non si spegnerà automaticamente durante la procedura di aggiornamento. |
[edit] Aggiornare il Neo FreeRunner
Dato che Openmoko è in continuo sviluppo, Openmoko rilascia delle versioni aggiornate del filesystem root, del kernel e del U-Boot. Questi possono essere inseriti nella memoria Flash del Neo FreeRunner. Puoi usare il cavo USB e il programma forniti per aggiornare il tuo Neo FreeRunner.
| NOTE: L'Openmoko software team rilascia immagini del sistema aggiornate giornalmente. Se vuoi usare le ultime immagini, puoi scaricarle dal daily build, ma noi raccomandiamo di usare l'immagine più stabile, scaricabile da http://downloads.openmoko.org/releases/. Le immagini presenti sono testate dal team di test.
Altre informazioni sull'immagine corrente: http://wiki.openmoko.org/wiki/Latest_Images |
[edit] Step1. Scaricare DFU-util
Puoi scaricare il software per l'aggiornamento da: http://downloads.openmoko.org/releases/Om2008.4/dfu-util
Su un sistema GNU/Linux puoi usare i seguenti programmi per scaricare dfu-util: wget http://downloads.openmoko.org/releases/Om2008.4/dfu-util
Successivamente dovete cambiare i permessi al file: chmod a+x dfu-util
[edit] Step 2. Preparare il Neo FreeRunner
Spegnere il FreeRunner se è acceso ed entrare nell'U-Boot della NOR Flash. Per svolgere l'aggiornamento il Neo FreeRunner ha bisogno di essere dentro l'U-Boot.
Collegarlo al PC tramite cavo USB e dare il comando ./dfu-util -l
Il comando restituirà una stringa simile a questa:
dfu-util - (C) 2007 by OpenMoko Inc. This program is Free Software and has ABSOLUTELY NO WARRANTY
Found Runtime: [0x1d50:0x5119] devnum=0, cfg=0, intf=2, alt=0, name="UNDEFINED"
Annotare il valore compreso fra le parentesi quadre, qualcosa del tipo ??????:??????
[edit] Step 3. Aggiornare il Kernel
Puoi scaricare il kernel da http://downloads.openmoko.org/releases/
I file del kernel sono quelli che contengono la dicitura uImage
Digita i seguenti comandi su un sistema GNU/Linux. In alcuni sistemi bisogna essere l'utente root prima di fare questo lavoro.
./dfu-util -d (valore annotato precedentemente) -a kernel -R -D (nome del file dell'immagine scaricato precedentemente).
esempio:
./dfu-util -d 0x1d50:0x5119 -a kernel -R -D Om2008.8.uImage.bin
Quando l'aggiornamento sarà completo, sul terminale del vostro PC verrà esposto il seguente messaggio:
status(0) = No error condition is present
Done!
| NOTE: Il significato dei parametri che avete dato è:
-d Specifica quale dispositivo collegato al PC è il Neo FreeRunner
-a --alt alt Specifica l'altsetting dell'interfaccia DFU da un nome o da un numero |
[edit] Step 4. Aggiornare il Filesystem Root
Puoi scaricare il filesystem root da: http://downloads.openmoko.org/releases/
I file contenenti il filesystem root sono quelli contenenti la dicitura rootfs
Digita i seguenti comandi in un sistema GNU/Linux. Su alcuni sistemi bisogna essere l'utente root (amministratore).
./dfu-util -d (valore annotato precedentemente) -a rootfs -R -D (nome del file contenente il filesystem root)
esempio:
./dfu-util -d 0x1d50:0x5119 -a rootfs -R -D Om2008.8.rootfs.jffs2
Quando l'aggiornamento sarà completo, sul terminale del vostro PC sarà mostrato il seguente messaggio:
status(0) = No error condition is present
Done!
[edit] Appendice
Se ti interessa sapere altri riguardo il Neo FreeRunner allora puoi suguire questi argomenti:
- GTA02 Openness
- Neo FreeRunner
- Neo FreeRunner GTA02 Hardware
- FreeRunner/Buttons and LEDs
- Latest Images
- Distributions
Per cercare con Google su questo wiki scrivere quanto segue:
<search term> site:http://wiki.openmoko.org/wiki/
Un ottimo tool per cercare nelle Openmoko mailing list è http://openmoko.markmail.org/ .
