SHR User Manual
From Openmoko
(→Init opkg database) |
Marko Knöbl (Talk | contribs) (grammar corrections, removing parts which don't belong in a manual, replacing "FreeRunner" with generic term "phone") |
||
| Line 10: | Line 10: | ||
{{Note|As SHR doesn't provide testing images at the moment this manual was based on unstable images available on the beginning of August 2009. The unstable images get changed very often - the download location changes, default applications change, bugs get hunted and fixed, meaning that some parts of this manual are already outdated.}} | {{Note|As SHR doesn't provide testing images at the moment this manual was based on unstable images available on the beginning of August 2009. The unstable images get changed very often - the download location changes, default applications change, bugs get hunted and fixed, meaning that some parts of this manual are already outdated.}} | ||
| − | '''SHR''' (Stable Hybrid Release) is here to provide you with Root FileSystem images that you can easily install onto your | + | '''SHR''' (Stable Hybrid Release) is here to provide you with Root FileSystem images that you can easily install onto your phone to use as a daily phone. It's filled with prepackaged software that can be installed upon demand by users, it can also be used by developers as a base image for customized and flavored distribution or release. SHR unstable is a testing environment before software get stabilized and it is the main testing ground for [[FSO]] releases. SHR testing images (currently not available) provide as much stability as possible for day-to-day usage. |
| − | + | ||
| − | + | ||
SHR users, readers of this manual, please report improvements, discrepancies or missing features on this page to <tt>vanous @ penguin . cz</tt>. Thank you. | SHR users, readers of this manual, please report improvements, discrepancies or missing features on this page to <tt>vanous @ penguin . cz</tt>. Thank you. | ||
[http://shr-project.org SHR Project page] | [http://shr-project.org SHR Project page] | ||
| − | |||
| − | |||
| − | |||
| − | |||
==Installation== | ==Installation== | ||
| Line 40: | Line 34: | ||
opkg update | opkg update | ||
opkg install task-shr-apps task-shr-games task-shr-gtk | opkg install task-shr-apps task-shr-games task-shr-gtk | ||
| − | |||
| − | |||
===Image content=== | ===Image content=== | ||
| Line 151: | Line 143: | ||
or check SHR Settings -> Other -> Image information | or check SHR Settings -> Other -> Image information | ||
| − | |||
===Booting=== | ===Booting=== | ||
| − | Press the power button until you feel a soft vibration to start the | + | Press the power button until you feel a soft vibration to start the phone. The booting splash screen will appear. The first boot after a new installation always takes a bit longer. It is recommended to reboot after this first boot, to make sure all packages got initialized properly. |
[[Image:Shr-boot-preview.png|200px|thumb|center|SHR Boot Splash screen]] | [[Image:Shr-boot-preview.png|200px|thumb|center|SHR Boot Splash screen]] | ||
| Line 194: | Line 185: | ||
===First look=== | ===First look=== | ||
[[Image:SHR-First-Look.png|200px|thumb|Desktop screen]] | [[Image:SHR-First-Look.png|200px|thumb|Desktop screen]] | ||
| − | '''Illume desktop''' is default home screen of the SHR desktop. Application files located in /usr/share/applications are displayed here. All applications are ran fullscreen and you can switch between them by using the Task switcher in the | + | '''Illume desktop''' is the default home screen of the SHR desktop. Application files located in /usr/share/applications are displayed here. All applications are ran fullscreen and you can switch between them by using the Task switcher in the top shelf or by using the '''<''' left or right '''>''' arrows in the top shelf. |
| − | The Illume desktop can be easily customized - slide the | + | The Illume desktop can be easily customized - slide the top shelf down and tap the Settings icon (Wrench). |
{{Note|TIP: for better access of the Settings icon, tap and hold the Settings icon, then drag it to the right.}} | {{Note|TIP: for better access of the Settings icon, tap and hold the Settings icon, then drag it to the right.}} | ||
| Line 202: | Line 193: | ||
'''Illume settings''' (the wrench) provides various options to alter the desktop environment. You can change sizes of elements, single or double click, wallpaper. To access all the various options, open Illume Settings and slide the visible icons to the left, to preview more options on the right hand side. | '''Illume settings''' (the wrench) provides various options to alter the desktop environment. You can change sizes of elements, single or double click, wallpaper. To access all the various options, open Illume Settings and slide the visible icons to the left, to preview more options on the right hand side. | ||
| − | The little applets in the | + | The little applets in the top shelf (for example Battery, GSM, Bluetooth etc.) are called '''shelf gadgets''' and you can configure whether they are visible (on the front part of the top shelf) or hidden (you can access them by sliding the top shelf) through Illume Settings -> Display -> Shelf gadget. |
| − | Some screens are not resized properly to fit the | + | Some screens are not resized properly to fit the phone's display - for example the Wallpapper setting. This is a known bug already reported upstream. |
| − | <!-- [[Image:SHR-Top-Shelve.png|200px|thumb|Top | + | <!-- [[Image:SHR-Top-Shelve.png|200px|thumb|Top Shelf]] --> |
===Phone applications=== | ===Phone applications=== | ||
| Line 258: | Line 249: | ||
|} | |} | ||
| − | Upon a missed call or an unread message there is a | + | Upon a missed call or an unread message there is a notifier that presents a screen with button to run Messages or Phonelog application, or you can simply close the Notifier with the Top Shelf cross. |
===Post-Installation Script=== | ===Post-Installation Script=== | ||
| − | After flashing your | + | After flashing your phone you can do some modification mentioned below in this manual. The shell commands are collected in a [[SHR post-installation]] that you can transfer to your phone via ''scp'' and execute it with ''sh''. |
Please go through the script and check if the applications to be installed is that want you want. If do not understand, what is going on in the script, proceed with this manual and select every step manually. If understand the script it might save you some time: | Please go through the script and check if the applications to be installed is that want you want. If do not understand, what is going on in the script, proceed with this manual and select every step manually. If understand the script it might save you some time: | ||
desktop# | desktop# | ||
scp SHRpostinstallation.sh root@192.168.0.202/home/root/SHRpostinstallation.sh | scp SHRpostinstallation.sh root@192.168.0.202/home/root/SHRpostinstallation.sh | ||
| − | Start the shell script on | + | Start the shell script on your phone with: |
neo# sh /home/root/SHRpostinstallation.sh | neo# sh /home/root/SHRpostinstallation.sh | ||
| − | |||
| − | |||
===First steps=== | ===First steps=== | ||
| Line 274: | Line 263: | ||
Right after installation and first boot you might want to do a few initial steps: | Right after installation and first boot you might want to do a few initial steps: | ||
====Network Connection==== | ====Network Connection==== | ||
| − | ''Establish network connection'' and SSH into your | + | ''Establish network connection'' and SSH into your phone. The <tt>root</tt> account uses no password by default. You can establish connection either via USB to your desktop and enable NAT or you can connect through Wifi. If you use USB, some setup is required on the desktop side, please read [[USB_Networking]]. For Wifi, you can use [[#Network manager|Network Manager]] |
====GSM Network==== | ====GSM Network==== | ||
| Line 281: | Line 270: | ||
====Audio: Volume==== | ====Audio: Volume==== | ||
''Check and set call volume'' - this is handled by alsa state files in <tt>/usr/share/shr/scenarii/</tt> . To customize speaker volume edit <tt>/usr/share/shr/scenarii/gsmhandset.state</tt> and change <tt>control 4</tt>. Values between from 105 to 120 might be sufficient: | ''Check and set call volume'' - this is handled by alsa state files in <tt>/usr/share/shr/scenarii/</tt> . To customize speaker volume edit <tt>/usr/share/shr/scenarii/gsmhandset.state</tt> and change <tt>control 4</tt>. Values between from 105 to 120 might be sufficient: | ||
| − | |||
vi /usr/share/shr/scenarii/gsmhandset.state | vi /usr/share/shr/scenarii/gsmhandset.state | ||
| − | |||
control.4 { | control.4 { | ||
| Line 334: | Line 321: | ||
| − | ==== | + | ====Initializing the opkg database==== |
| − | ''Initialize opkg database'' in order to install some applications from SHR repositories or from other sources, for example [[http://opkg.org opkg.org]]. While still being online, you need to first run | + | ''Initialize the opkg database'' in order to install some applications from SHR repositories or from other sources, for example [[http://opkg.org opkg.org]]. While still being online, you need to first run |
opkg update | opkg update | ||
| Line 366: | Line 353: | ||
====SwapSpace==== | ====SwapSpace==== | ||
{{Main|SwapSpace}} | {{Main|SwapSpace}} | ||
| − | + | When the RAM is used up applications get killed. This is particularly bad while doing opkg upgrade. Therefore you might want to create a swap partition. | |
| − | WARNING: this mights kill your | + | WARNING: this mights kill your SD card, since there might be a lot of read/writes to the same spot. (all recent tests failed to harm SD cards by torture write tests, so probably you just shouldn't worry) |
dd if=/dev/zero of=/swapfile bs=1024 count=65536 | dd if=/dev/zero of=/swapfile bs=1024 count=65536 | ||
| Line 399: | Line 386: | ||
====Locate lost phone by GPS==== | ====Locate lost phone by GPS==== | ||
| − | To locate your | + | To locate your phone in case of loss or theft by getting SMS with GPS location install '''sms-sentry''': |
| − | + | ||
opkg install sms-sentry | opkg install sms-sentry | ||
| − | Then, upon sending an | + | Then, upon sending an SMS with the text sentry:location to your phone, the phone will turn on GPS, wait for a fix and send back an SMS with the current location. |
| − | [[openBmap]] and [[Cellhunter]] are projects with the objective to collect GPS location of GSM network cells. If this project is finished then | + | [[openBmap]] and [[Cellhunter]] are projects with the objective to collect GPS location of GSM network cells. If this project is finished then SMS-sentry could send the a rough location just by identifying the current distances (strength of signal) to the available GSM network cells, even when the GPS satellites are not available (e.g. in a house). |
===Localization=== | ===Localization=== | ||
[[Image:SHR-Illume-Settings-Languages.png|200px|thumb|Setting Language]] | [[Image:SHR-Illume-Settings-Languages.png|200px|thumb|Setting Language]] | ||
| − | You can change the language of the SHR desktop environment by using the Settings of Illume. For Example, for Czech language: in Illume | + | You can change the language of the SHR desktop environment by using the Settings of Illume. For Example, for Czech language: in the Illume top shelf go to Wrench (Settings) -> Language -> Language Settings -> and choose: Čeština. If your language is not in the menu you can install by using opkg. |
You can list all available languages by running: | You can list all available languages by running: | ||
| Line 449: | Line 435: | ||
===Date and time=== | ===Date and time=== | ||
| − | + | The local timezone is automatically retrieved from the GSM network. Date and time are automatically set from GPS or Network. The easiest way of setting the time for the first time is to run TangoGps (GPS & Map icon) and obtaining GPS fix. Time will then be set automatically after several minutes. | |
Time can set time also manually. | Time can set time also manually. | ||
| Line 472: | Line 458: | ||
ntpserver = 134.169.172.1 | ntpserver = 134.169.172.1 | ||
| − | |||
To disable automatic date/zone settings, simply create an empty [otimed] section in /etc/frameworkd.conf | To disable automatic date/zone settings, simply create an empty [otimed] section in /etc/frameworkd.conf | ||
| Line 482: | Line 467: | ||
===Data synchronization=== | ===Data synchronization=== | ||
| − | [[Image:SHR-PISI.png|200px|thumb|PISI | + | [[Image:SHR-PISI.png|200px|thumb|PISI contact synchronization]] |
| − | [[Image:SHR-PISI-dates.png|200px|thumb|PISI | + | [[Image:SHR-PISI-dates.png|200px|thumb|PISI calendar synchronization]] |
You can synchronize your contacts and appointments data with various sources. The sync can by done by program called [http://pisi.projects.openmoko.org/ PISI] . SIM contacts and calendar entries are currently possible to sync on SHR. You can also synchronize OPIMD contacts, these data are however so far no used in the current shr phone applications, but are used by for example Litephone. | You can synchronize your contacts and appointments data with various sources. The sync can by done by program called [http://pisi.projects.openmoko.org/ PISI] . SIM contacts and calendar entries are currently possible to sync on SHR. You can also synchronize OPIMD contacts, these data are however so far no used in the current shr phone applications, but are used by for example Litephone. | ||
| Line 555: | Line 540: | ||
===Reporting bugs=== | ===Reporting bugs=== | ||
| − | SHR is a work in progress. | + | SHR is a work in progress. If you experience issues, please report them back to SHR. With your report provide logs from |
/var/log/ophonekitd | /var/log/ophonekitd | ||
| Line 562: | Line 547: | ||
To report a bug, please go to http://shr-project.org/trac/report | To report a bug, please go to http://shr-project.org/trac/report | ||
| − | Check if the bug is already reported. If | + | Check if the bug is already reported. If not, add a ticket, be as much precise as you can in the title and the description, in what circumstances the issue happened and so on. |
==Car Navigation== | ==Car Navigation== | ||
| Line 568: | Line 553: | ||
===Add opkg feed=== | ===Add opkg feed=== | ||
| − | To install <tt>navit</tt> as a car navigation system on your | + | To install <tt>navit</tt> as a car navigation system on your phone you have to add the feed for the installer <tt>opkg</tt> |
http://download.navit-project.org/navit/openmoko/svn/ | http://download.navit-project.org/navit/openmoko/svn/ | ||
You can do this by: | You can do this by: | ||
| Line 589: | Line 574: | ||
* mark a rectangle for your map (e.g. for Germany) and click select the rectanglular map. [[Image:osmdownload.jpg|200px|thumb|Download OpenStreetMaps]] | * mark a rectangle for your map (e.g. for Germany) and click select the rectanglular map. [[Image:osmdownload.jpg|200px|thumb|Download OpenStreetMaps]] | ||
* then click on download and save the file to <tt>country.bin</tt> (e.g. <tt>germany.bin</tt>) on your desktop computer. | * then click on download and save the file to <tt>country.bin</tt> (e.g. <tt>germany.bin</tt>) on your desktop computer. | ||
| − | * copy the file to on your | + | * copy the file to on your phone. Because of the size of the maps you copy map to the Micro-SD card on your phone. Create a directory for the maps and copy the files from desktop to phone: |
mkdir /media/card/maps | mkdir /media/card/maps | ||
scp germany.bin root@192.168.0.202:/media/card/maps | scp germany.bin root@192.168.0.202:/media/card/maps | ||
| Line 612: | Line 597: | ||
===Start Navit=== | ===Start Navit=== | ||
| − | Start <tt>Navit</tt> on your | + | Start <tt>Navit</tt> on your phone for your first test. For further configuration details see [http://wiki.openmoko.org/index.php?title=Navit OpenMoko Article for Navit] or the project website of [http://wiki.navit-project.org/index.php/Configuring_Navit Navit-Project]. |
===No sound after installing Navit=== | ===No sound after installing Navit=== | ||
| − | Navit tends to depend on speech-dispatcher and after a suspend, the | + | Navit tends to depend on speech-dispatcher and after a suspend, the phone does not ring anymore for incoming calls or messages, it only vibrates. To correct this remove speech-dispatcher: |
opkg remove -force-depends speech-dispatcher | opkg remove -force-depends speech-dispatcher | ||
| Line 623: | Line 608: | ||
[[Image:SHR-Settings-main.png|200px|thumb|SHR Settings]] | [[Image:SHR-Settings-main.png|200px|thumb|SHR Settings]] | ||
| − | SHR Settings is the main setting application of SHR | + | SHR Settings is the main setting application of SHR. It provides an easy way of setting up your phone to your liking - from phone related settings, to requesting resources in order to prevent screen dim or suspend (for example while using GPS). |
Please refer to [http://wiki.openmoko.org/wiki/FSO_Resources#Automatic_way this wiki page] about a better way to manage preventing screen dim or suspend. | Please refer to [http://wiki.openmoko.org/wiki/FSO_Resources#Automatic_way this wiki page] about a better way to manage preventing screen dim or suspend. | ||
| − | While some settings are persistent over reboots, | + | While some settings are persistent over reboots, others are not. |
===Main Screen=== | ===Main Screen=== | ||
| − | + | The main screen is divided into eight categories, which contain several modules. Every SHR Settings module has a specified task - for example controlling the GSM antenna power, setting the time etc. | |
===Settings: Phone=== | ===Settings: Phone=== | ||
| − | Here you can | + | Here you can set if the GSM antenna is on and if your phone number is shown when you call someone. |
'''GSM''' | '''GSM''' | ||
In GSM settings you can turn off and on GSM module. After turning off antenna, whole GSM modem is turned off. | In GSM settings you can turn off and on GSM module. After turning off antenna, whole GSM modem is turned off. | ||
| − | To list available providers, click on Operators button. Scanning can take some time. After while, list of operators should pop up. | + | To list available providers, click on Operators button. Scanning can take some time. After a while, a list of operators should pop up. |
| − | You can't connect to operators marked [forbidden]. After | + | You can't connect to operators marked [forbidden]. After a connection failure, a message is displayed. |
| − | Selecting operator from list also changes modem registration mode to manual. It won't register to other network, even if some is available and has better signal strengh. To return to automatic mode, click "Automatic" button in operator list. | + | Selecting an operator from the list also changes modem registration mode to manual. It won't register to other network, even if some is available and has better signal strengh. To return to automatic mode, click "Automatic" button in operator list. |
'''Call''' | '''Call''' | ||
| Line 669: | Line 654: | ||
'''Profile''' | '''Profile''' | ||
| − | Here you can select current profile, which device should use to determine ring tone etc. | + | Here you can select the current profile, which the device should use to determine ring tone etc. |
'''Current profile''' | '''Current profile''' | ||
| − | Here you can adjust properties of currently used profile. Available settings: ring tone, ring volume, ring vibration, ring loop, ring length, message tone, message volume, message vibration, message loop, message length. | + | Here you can adjust properties of the currently used profile. Available settings: ring tone, ring volume, ring vibration, ring loop, ring length, message tone, message volume, message vibration, message loop, message length. |
| − | To change ring tone, click | + | To change the ring tone, click the "Change" button. |
To use your own ring tone, place it in /usr/share/sounds directory. | To use your own ring tone, place it in /usr/share/sounds directory. | ||
| − | After selecting sid tune as ring tone, there are available controls to select tune number from file. | + | After selecting a sid tune as the ring tone, there are available controls to select tune number from the file. |
| − | + | ||
This is changing settings in /etc/freesmartphone/opreferences/conf/phone/default.yaml | This is changing settings in /etc/freesmartphone/opreferences/conf/phone/default.yaml | ||
| Line 696: | Line 680: | ||
Note that it's a ! used and not a | to construct the gstreamer pipe command. | Note that it's a ! used and not a | to construct the gstreamer pipe command. | ||
| − | |||
| − | |||
{| class="wikitable" cellspacing="0" cellpadding="0" style="padding: 0%; margin:0em 0em 1em 0em; border:1px solid #c0c0c0; background:#eeeeee; floating="center";width:100%; " | {| class="wikitable" cellspacing="0" cellpadding="0" style="padding: 0%; margin:0em 0em 1em 0em; border:1px solid #c0c0c0; background:#eeeeee; floating="center";width:100%; " | ||
| − | |||
! style="background:#fcfcfc;border-left:1px solid #9999cc;border-right:1px ; border-top:2px solid 75d806; border:0px solid #222222; width:50% " | | ! style="background:#fcfcfc;border-left:1px solid #9999cc;border-right:1px ; border-top:2px solid 75d806; border:0px solid #222222; width:50% " | | ||
| Line 715: | Line 696: | ||
{| class="wikitable" cellspacing="0" cellpadding="0" style="padding: 0%; margin:0em 0em 1em 0em; border:1px solid #c0c0c0; background:#eeeeee; floating="center";width:100%; " | {| class="wikitable" cellspacing="0" cellpadding="0" style="padding: 0%; margin:0em 0em 1em 0em; border:1px solid #c0c0c0; background:#eeeeee; floating="center";width:100%; " | ||
| − | |||
! style="background:#fcfcfc;border-left:1px solid #9999cc;border-right:1px ; border-top:2px solid 75d806; border:0px solid #222222; width:50% " | | ! style="background:#fcfcfc;border-left:1px solid #9999cc;border-right:1px ; border-top:2px solid 75d806; border:0px solid #222222; width:50% " | | ||
| Line 729: | Line 709: | ||
'''WiFi''' | '''WiFi''' | ||
| − | With "WiFi radio" toggle you can set, if wifi module | + | With the "WiFi radio" toggle you can set, if the wifi module is powered. WiFi radio has to be turned on before trying to connect to a WiFi network, unless you try to connect through Mokonnect which is capable of powering it up. |
'''GPRS''' | '''GPRS''' | ||
| − | To enter APN, login and password fields, just click on actual value (default: "internet"). Keyboard will pop up. | + | To enter APN, login and password fields, just click on the actual value (default: "internet"). Keyboard will pop up. |
If you don't know APN, login and passwork, ask your provider.}} | If you don't know APN, login and passwork, ask your provider.}} | ||
| − | {{Note|You can also use Mokonnect to manage your | + | {{Note|You can also use Mokonnect to manage your GPRS connection}} |
| − | To connect to GPRS network, just click "Connect" button. Entered values will be saved after successful connection. | + | To connect to the GPRS network, just click the "Connect" button. Entered values will be saved after successful connection. |
'''USB''' | '''USB''' | ||
| Line 746: | Line 726: | ||
'''Bluetooth''' | '''Bluetooth''' | ||
| − | To power up Bluetooth module, | + | To power up Bluetooth module, switch the "Bluetooth radio" toggle to "On". After that, the "Visibility" toggle should arrive - set it to "On" if you want your FR to be visible by other Bluetooth devices on scanning. |
===Settings: GPS=== | ===Settings: GPS=== | ||
| Line 772: | Line 752: | ||
This page can be used to monitor GPS status. If some value isn't known, then "unknown" is displayed. | This page can be used to monitor GPS status. If some value isn't known, then "unknown" is displayed. | ||
| − | You can also view information about every visible satellite and check, which are used for getting fix. To do that, | + | You can also view information about every visible satellite and check, which are used for getting a fix. To do that, click "Satellite details". |
If you experience problems with GPS, turn it off, click "Remove AGPS data" and reboot your Neo. | If you experience problems with GPS, turn it off, click "Remove AGPS data" and reboot your Neo. | ||
| Line 782: | Line 762: | ||
'''Time''' | '''Time''' | ||
| − | Here you can view and set | + | Here you can view and set the time. By default, the time is just displayed, To adjust it, click on "Set time". |
| − | After finishing adjusting, click "OK" button. | + | After finishing adjusting, click the "OK" button. |
'''Date''' | '''Date''' | ||
| − | This module displays current date. | + | This module displays the current date. |
===Settings: Power=== | ===Settings: Power=== | ||
| Line 794: | Line 774: | ||
'''Battery''' | '''Battery''' | ||
| − | This module displays informations about battery state - charge, voltage, remaining time etc. To update data, click "Update" button. | + | This module displays informations about battery state - charge, voltage, remaining time etc. To update the data, click the "Update" button. |
| − | Here you also force enable 500mA charging. | + | Here you can also force enable 500mA charging. |
'''Display''' | '''Display''' | ||
| − | With this slider you can easily | + | With this slider you can easily set the backlight brightness. |
{{Note|This setting isn't permanent over sessions. At boot backlight is set back to 100%.}} | {{Note|This setting isn't permanent over sessions. At boot backlight is set back to 100%.}} | ||
'''Power''' | '''Power''' | ||
| − | |||
{| class="wikitable" cellspacing="0" cellpadding="0" style="padding: 0%; margin:0em 0em 1em 0em; border:1px solid #c0c0c0; background:#eeeeee; floating="center";width:100%; " | {| class="wikitable" cellspacing="0" cellpadding="0" style="padding: 0%; margin:0em 0em 1em 0em; border:1px solid #c0c0c0; background:#eeeeee; floating="center";width:100%; " | ||
| − | |||
! style="background:#fcfcfc;border-left:1px solid #9999cc;border-right:1px ; border-top:2px solid 75d806; border:0px solid #222222; width:50% " | | ! style="background:#fcfcfc;border-left:1px solid #9999cc;border-right:1px ; border-top:2px solid 75d806; border:0px solid #222222; width:50% " | | ||
| Line 823: | Line 801: | ||
'''Timeouts''' | '''Timeouts''' | ||
| − | Here you can set up values of idle timeouts used by device. Timeouts are reached in this order: idle -> idle dim -> idle prelock -> lock -> suspend. Idle, idle prelock and lock aren't used by default in SHR at the moment. This setting changes parameters in /etc/frameworkd.conf : | + | Here you can set up values of idle timeouts used by the device. Timeouts are reached in this order: idle -> idle dim -> idle prelock -> lock -> suspend. Idle, idle prelock and lock aren't used by default in SHR at the moment. This setting changes parameters in /etc/frameworkd.conf : |
[odeviced.idlenotifier] | [odeviced.idlenotifier] | ||
| Line 848: | Line 826: | ||
Here is listed every interesting script from /etc/init.d/ directory. | Here is listed every interesting script from /etc/init.d/ directory. | ||
| − | After clicking on | + | After clicking on one, you can either start, restart or stop the service and view the result. |
===Settings: Others=== | ===Settings: Others=== | ||
| Line 866: | Line 844: | ||
'''Splash''' | '''Splash''' | ||
| − | With this selector you can select theme used by shr-splash at boot and shutdown. After clicking "Preview", selected boot image will be displayed for 5 seconds. | + | With this selector you can select the theme used by shr-splash at boot and shutdown. After clicking "Preview", the selected boot image will be displayed for 5 seconds. |
'''PIM''' | '''PIM''' | ||
| Line 872: | Line 850: | ||
Module used by opimd developers. Doesn't have influence on behaviour of default SHR image. | Module used by opimd developers. Doesn't have influence on behaviour of default SHR image. | ||
| − | Every opimd domain has different backends to store | + | Every opimd domain has different backends to store its data. The domain reads data from every backend and writes data to the default backend. So with the selector in shr-settings you can choose the backend that stores newly generated data, it doesn't copy or move existing data to a different backend. |
'''Userspace backups''' | '''Userspace backups''' | ||
| Line 880: | Line 858: | ||
'''Image information''' | '''Image information''' | ||
| − | This module contains basic information about installed image - name of buildhost, used revision, branch and time of build. | + | This module contains basic information about the installed image - name of buildhost, used revision, branch and time of build. |
'''Theming''' | '''Theming''' | ||
| Line 963: | Line 941: | ||
Enhanced configuration is possible through direct editing of /etc/network/interfaces or through Mokonnect. | Enhanced configuration is possible through direct editing of /etc/network/interfaces or through Mokonnect. | ||
| − | The <tt>connmand</tt> daemon with Mokonnect are the recommended user level applications for setting up networking. At the moment, Mokonnect can manage USB, Wifi and Gprs connections, as well as routing and NAT. Wifi device is not required to be manually turned on via SHR-Settings as Mokonnect will automatically enable the device when needed and disable after use. | + | The <tt>connmand</tt> daemon with Mokonnect are the recommended user level applications for setting up networking. At the moment, Mokonnect can manage USB, Wifi and Gprs connections, as well as routing and NAT. The Wifi device is not required to be manually turned on via SHR-Settings as Mokonnect will automatically enable the device when needed and disable it after use. |
{| class="wikitable" cellspacing="0" cellpadding="0" style="padding: 0%; margin:0em 0em 1em 0em; border:1px solid #c0c0c0; background:#eeeeee; floating="center";width:100%; " | {| class="wikitable" cellspacing="0" cellpadding="0" style="padding: 0%; margin:0em 0em 1em 0em; border:1px solid #c0c0c0; background:#eeeeee; floating="center";width:100%; " | ||
| Line 969: | Line 947: | ||
! style="background:#fcfcfc;border-left:1px solid #9999cc;border-right:1px ; border-top:2px solid 75d806; border:0px solid #222222; width:33% " | | ! style="background:#fcfcfc;border-left:1px solid #9999cc;border-right:1px ; border-top:2px solid 75d806; border:0px solid #222222; width:33% " | | ||
[[Image:SHR-Mokonnect.png|200px|thumb|Mokonnect]] | [[Image:SHR-Mokonnect.png|200px|thumb|Mokonnect]] | ||
| − | |||
! style="background:#fcfcfc;border-left:1px solid #9999cc;border-right:1px ; border-top:2px solid 75d806; border:0px solid #222222; width:33% " | | ! style="background:#fcfcfc;border-left:1px solid #9999cc;border-right:1px ; border-top:2px solid 75d806; border:0px solid #222222; width:33% " | | ||
| Line 984: | Line 961: | ||
==Bluetooth== | ==Bluetooth== | ||
| − | Bluetooth can be used for several different applications - file transfer, networking, HIDD, music playing (A2DP), calling etc. In some occasions, the devices need to be authorized - paired. At the moment, support for some bluetooth functions is better | + | Bluetooth can be used for several different applications - file transfer, networking, HIDD, music playing (A2DP), calling etc. In some occasions, the devices need to be authorized - paired. At the moment, support for some bluetooth functions is better than for others - it is possible to do all mentioned above with the notice that phone calls with bluetooth headset are always routed to the bluetooth even if it is not around, making it quite difficult to use. |
Don't forget you need to turn the bluetooth radio on in SHR Settings -> Connectivity -> Bluetooth Radio: On, where you can also make the bluetooth device visible. | Don't forget you need to turn the bluetooth radio on in SHR Settings -> Connectivity -> Bluetooth Radio: On, where you can also make the bluetooth device visible. | ||
| − | SHR | + | SHR uses bluez4 which is completely different from bluez3. The bluetoothd is taking care of most of the bluetooth now. Please see [[Manually using Bluetooth]] for detailed information about using bluetooth and also for a list of supported devices. |
===OBEX file transfer=== | ===OBEX file transfer=== | ||
| Line 996: | Line 973: | ||
opkg install obexpush | opkg install obexpush | ||
| − | Default receiving path (editable in /etc/default/opd_args ) | + | Default receiving path (editable in /etc/default/opd_args ) does not exist, so create it |
mkdir /var/obexpush | mkdir /var/obexpush | ||
| Line 1,020: | Line 997: | ||
This comes from [[Manually_using_Bluetooth#Once_Again.2C_Bluetooth_Headset_on_Freerunner]] | This comes from [[Manually_using_Bluetooth#Once_Again.2C_Bluetooth_Headset_on_Freerunner]] | ||
| − | Now, you must pair the bluetooth headset with your | + | Now, you must pair the bluetooth headset with your phone. Make sure the bluetooth chip is powered up (can be done through the Connectivity section in the SHR-Unstable settings manager) and that bluetoothd is running: |
/etc/init.d/bluetooth start | /etc/init.d/bluetooth start | ||
Now, to actually pair the bluetooth headset, you will need the simple-agent script. If you already have it, excellent. If you, like me, do not, then you can get it here: http://dl.getdropbox.com/u/453116/simple-agent | Now, to actually pair the bluetooth headset, you will need the simple-agent script. If you already have it, excellent. If you, like me, do not, then you can get it here: http://dl.getdropbox.com/u/453116/simple-agent | ||
| Line 1,107: | Line 1,084: | ||
Then go to SHR Settings -> Others -> Themes. Here you can preview installed themes and change the default one. | Then go to SHR Settings -> Others -> Themes. Here you can preview installed themes and change the default one. | ||
| − | |||
| − | |||
===Enable mouse cursor=== | ===Enable mouse cursor=== | ||
| Line 1,120: | Line 1,095: | ||
Set the Elementary rendering engine used for Evas to x11-16 (Software X11 16bpp engine, may have bugs and will be lower quality, but faster): | Set the Elementary rendering engine used for Evas to x11-16 (Software X11 16bpp engine, may have bugs and will be lower quality, but faster): | ||
echo -e "#!/bin/sh\n\nexport ELM_ENGINE=x11-16" > /etc/profile.d/set-elm-engine.sh | echo -e "#!/bin/sh\n\nexport ELM_ENGINE=x11-16" > /etc/profile.d/set-elm-engine.sh | ||
| − | |||
Additionally in the SHR-Unstable repositories there are theme packages optimized for 16bpp color. Both packages can be installed with the following command: | Additionally in the SHR-Unstable repositories there are theme packages optimized for 16bpp color. Both packages can be installed with the following command: | ||
| Line 1,139: | Line 1,113: | ||
===Speedup of suspend and wake up=== | ===Speedup of suspend and wake up=== | ||
| − | I you are using Qi and installation on µSD card, you can change the kernel parameter loglevel=1 1 in /boot/append-GTA02 . For u-boot and installation in nand just type | + | I you are using Qi and installation on a µSD card, you can change the kernel parameter loglevel=1 1 in /boot/append-GTA02 . For u-boot and installation in nand just type |
klogd -c 1 | klogd -c 1 | ||
| Line 1,188: | Line 1,162: | ||
opkg install $line -force-reinstall | opkg install $line -force-reinstall | ||
done | done | ||
| − | |||
===Random errors=== | ===Random errors=== | ||
| Line 1,211: | Line 1,184: | ||
You will get disconnected from the ssh session, wait until keys get generated and log in again. | You will get disconnected from the ssh session, wait until keys get generated and log in again. | ||
| − | {{Note|'''Remove old SSH Key from <tt>.ssh/known_hosts</tt>:''' On your Linux box you will find a file <tt>known_host</tt> in the subdirectory <tt>.ssh/</tt> in you home directory. This contains a ssh key for the connection to your | + | {{Note|'''Remove old SSH Key from <tt>.ssh/known_hosts</tt>:''' On your Linux box you will find a file <tt>known_host</tt> in the subdirectory <tt>.ssh/</tt> in you home directory. This contains a ssh key for the connection to your phone. If new keys are generated or if you flash your phone with SHR then you have to remove the line with <tt>openmoko</tt> or the IP-address of your phone from the file. Otherwise you might be able to login in again. }} |
===Video playback=== | ===Video playback=== | ||
| Line 1,232: | Line 1,205: | ||
mencoder video-file -ovc lavc -lavcopts vcodec=mpeg4:vhq:vbitrate=300 -vf scale=320:240,eq2=1.2:0.5:-.025,rotate=2 -oac mp3lame -lameopts br=64:cbr -o video-file-FR.avi | mencoder video-file -ovc lavc -lavcopts vcodec=mpeg4:vhq:vbitrate=300 -vf scale=320:240,eq2=1.2:0.5:-.025,rotate=2 -oac mp3lame -lameopts br=64:cbr -o video-file-FR.avi | ||
| − | ===Adding | + | ===Adding your phone to your hosts=== |
| − | You can add | + | You can add your phone to your hosts file for a name resolving: |
| − | You can use the name <tt>neo</tt> if you added the host <tt>neo</tt> in <tt>/etc/hosts</tt> on your desktop computer (add the following line for host <tt>neo</tt> assuming that the IP-address of your | + | You can use the name <tt>neo</tt> if you added the host <tt>neo</tt> in <tt>/etc/hosts</tt> on your desktop computer (add the following line for host <tt>neo</tt> assuming that the IP-address of your phone is <tt>192.168.0.202</tt>. |
echo "192.168.0.202 neo neo" >> /etc/hosts | echo "192.168.0.202 neo neo" >> /etc/hosts | ||
| − | You can then access your | + | You can then access your phone like this: |
ssh root@neo | ssh root@neo | ||
| − | Which is shorter | + | Which is shorter than this: |
ssh root@192.168.0.202 | ssh root@192.168.0.202 | ||
| Line 1,259: | Line 1,232: | ||
'''Cool applications''' | '''Cool applications''' | ||
| − | SHR comes with only few preinstalled applications but | + | SHR comes with only a few preinstalled applications but its repository provides more cool stuff. Also, there are applications that are not in SHR repos at the moment but can still be installed. The following few examples are here just to spark your interest: |
'''SHR Launcher''' | '''SHR Launcher''' | ||
[[Image:Launcher.png|200px|thumb|SHR Launcher]] | [[Image:Launcher.png|200px|thumb|SHR Launcher]] | ||
| − | Launcher is elementary based alternative home screen application and event notifier for SHR. It displays current time, has a user tweak-able launcher with categories and features missed calls and messages applets. | + | Launcher is an elementary based alternative home screen application and event notifier for SHR. It displays current time, has a user tweak-able launcher with categories and features missed calls and messages applets. |
opkg install libsqlite3-0 http://www.opkg.org/packages/launcher_0.30_arm.ipk | opkg install libsqlite3-0 http://www.opkg.org/packages/launcher_0.30_arm.ipk | ||
| − | If you | + | If you don't see some icons, copy all icons from /usr/share/icons/shr/86x86/apps/* to /usr/share/pixmaps. |
For '''PIM''' applications you can get dates for calendar, tasks for todos, neote for notes: | For '''PIM''' applications you can get dates for calendar, tasks for todos, neote for notes: | ||
| Line 1,305: | Line 1,278: | ||
[[Image:SHR-Litephone.png|200px|left|thumb|Litephone]] | [[Image:SHR-Litephone.png|200px|left|thumb|Litephone]] | ||
| − | Litephone is new alternative set of phone applications written in Qt. In it's single application interface it provides basic phone functionality (contacts, calls, messages, phone log, settings). | + | Litephone is a new alternative set of phone applications written in Qt. In it's single application interface it provides basic phone functionality (contacts, calls, messages, phone log, settings). Its main advantage is that it uses opimd for storage of the user data. |
opkg install http://pvtrace.com/litephone/libqtcore4_4.4.3-r3_armv4t.ipk | opkg install http://pvtrace.com/litephone/libqtcore4_4.4.3-r3_armv4t.ipk | ||
| Line 1,314: | Line 1,287: | ||
opkg install http://pvtrace.com/litephone/litephone_0.0.1-r3_armv4t.ipk | opkg install http://pvtrace.com/litephone/litephone_0.0.1-r3_armv4t.ipk | ||
| − | '''Mokomaze''' is an | + | '''Mokomaze''' is an eye-candy game using accelerators embedded in your device. |
opkg install mokomaze | opkg install mokomaze | ||
| Line 1,348: | Line 1,321: | ||
| − | '''Literki''' is full qwerty keyboard with configurable layout, always transparent, therefore applications don't need to redraw screens and popup is therefore very fast. The keys are big enough for everyday use with your fat fingers. To pop up the keyboard: slide your finger upwards from the bottom right corner. To hide the keyboard: slide your finger down on the keyboard. [http://www.opkg.org/package_232.html Opkg page] | + | '''Literki''' is a full qwerty keyboard with configurable layout, always transparent, therefore applications don't need to redraw screens and popup is therefore very fast. The keys are big enough for everyday use with your fat fingers. To pop up the keyboard: slide your finger upwards from the bottom right corner. To hide the keyboard: slide your finger down on the keyboard. [http://www.opkg.org/package_232.html Opkg page] |
opkg install http://pvtrace.com/literki_0.0.2-r3_armv4t.ipk | opkg install http://pvtrace.com/literki_0.0.2-r3_armv4t.ipk | ||
[[Category:SHR]] | [[Category:SHR]] | ||
Revision as of 19:06, 29 August 2009
| Languages: |
English • العربية • Български • Česky • Dansk • Deutsch • Esperanto • Eesti • Español • فارسی • Suomi • Français • עברית • Magyar • Italiano • 한국어 • Nederlands • Norsk (bokmål) • Polski • Português • Română • Русский • Svenska • Slovenčina • Українська • 中文(中国大陆) • 中文(台灣) • Euskara • Català |
|
SHR Introduction
Welcome to SHR, the world of community driven distribution for (not only) OpenmokoNeo phones.
| NOTE: As SHR doesn't provide testing images at the moment this manual was based on unstable images available on the beginning of August 2009. The unstable images get changed very often - the download location changes, default applications change, bugs get hunted and fixed, meaning that some parts of this manual are already outdated. |
SHR (Stable Hybrid Release) is here to provide you with Root FileSystem images that you can easily install onto your phone to use as a daily phone. It's filled with prepackaged software that can be installed upon demand by users, it can also be used by developers as a base image for customized and flavored distribution or release. SHR unstable is a testing environment before software get stabilized and it is the main testing ground for FSO releases. SHR testing images (currently not available) provide as much stability as possible for day-to-day usage.
SHR users, readers of this manual, please report improvements, discrepancies or missing features on this page to vanous @ penguin . cz. Thank you.
Installation
Getting SHR
First, determine which model of phone you have, the GTA01(neo1973) or the GTA02(FreeRunner).
You need to download two files for your version as above, kernel and root filesystem. Depending whether you will be installing into the internal NAND memory or on µSD card, you need to either get .jffs2 file for nand or .tar.gz file for µSD.
At this point, there are no recent testing images so for the GTA02 Freerunner you need to download the images of unstable release from http://build.shr-project.org/shr-unstable/images/om-gta02/
- Get the latest kernel: uImage-om-gta02-latest.bin
- Get the root filesystem, for nand: full-om-gta02.jffs2, (for µSD): full-om-gta02.tar.gz
These are full images. You can also choose image with less packages, marked as lite which can be upgraded to the full image by running
opkg update
opkg install task-shr-apps task-shr-games task-shr-gtk
Image content
| Full image content | SHR-Image LITE Content | |
|---|---|---|
| Window Manager |
|
|
| Engine |
|
|
| Telephony |
|
|
| GPS |
|
|
| Utilities |
|
|
| Media |
|
|
| Internet |
|
|
| Games |
|
|
| Settings |
|
|
Installation on Flash
In order to install your SHR distribution directly to your Freerunner Flash memory (NAND), you need to get the desired filesystem file ( .jffs2 ) as described above and flash your device using the dfu-util tool.
Please visit Flashing the Neo FreeRunner for more details about flashing and see Dfu-util for detailed information about the dfu-util.
Command to flash the filesystem and the kernel
dfu-util -a rootfs -R -D shr-image-om-gta02.jffs2
dfu-util -a kernel -R -D uImage-om-gta02-latest.bin
Installation on µSD Card
Installing SHR on your µSD Card depends on the Bootloader you are using, uBoot or Qi.
In simply words, difference between both systems resides on how you must prepare your µSD Card and files you use to fill them:
- If you use uBoot, you need to create two partitions. First partition, not so big, in FAT16 where you have to place the kernel file (uImage-om-gta02-latest.bin) and second partition in ext2 or ext3 where you have to uncompress the filesystem file (shr-image-om-gta02.tar.gz).
- If you use Qi, you only need an ext2 partition into your µSD Card where you uncompress the filesystem image file (shr-image-om-gta02.tar.gz). In this case Qi Bootloader is going to look for the kernel image into the /boot directory for file named uImage-GTA02.bin .
Please visit links below for detailed information and tips:
SHR version
Should you ever later wonder what version of SHR you have actually installed, please run
cat /etc/shr-version
or check SHR Settings -> Other -> Image information
Booting
Press the power button until you feel a soft vibration to start the phone. The booting splash screen will appear. The first boot after a new installation always takes a bit longer. It is recommended to reboot after this first boot, to make sure all packages got initialized properly.

Initial Setup

On the first boot, Setup is automatically initiated to walk the user through basic setup of the Enlightenment desktop environment. You are able to choose preferred language of the desktop environment, Illume SHR themed profile or select default menu (only one at the moment).
On the Add icon screen you can add icons for some application. If you add a terminal based application like mplayer, you will see an icon but no application running upon click, as it will run in the background. Last screen allow settin up quick launch applications.
 |
 |
|
 |
|---|
Running SHR
SIM Auth

SIM Pin is asked for upon start up.
First look

Illume desktop is the default home screen of the SHR desktop. Application files located in /usr/share/applications are displayed here. All applications are ran fullscreen and you can switch between them by using the Task switcher in the top shelf or by using the < left or right > arrows in the top shelf.
The Illume desktop can be easily customized - slide the top shelf down and tap the Settings icon (Wrench).
| NOTE: TIP: for better access of the Settings icon, tap and hold the Settings icon, then drag it to the right. |
Illume settings (the wrench) provides various options to alter the desktop environment. You can change sizes of elements, single or double click, wallpaper. To access all the various options, open Illume Settings and slide the visible icons to the left, to preview more options on the right hand side.
The little applets in the top shelf (for example Battery, GSM, Bluetooth etc.) are called shelf gadgets and you can configure whether they are visible (on the front part of the top shelf) or hidden (you can access them by sliding the top shelf) through Illume Settings -> Display -> Shelf gadget.
Some screens are not resized properly to fit the phone's display - for example the Wallpapper setting. This is a known bug already reported upstream.
Phone applications
Besides other software, SHR comes with 4 main phone applications: Dialer, Contacts, Messages and Phone log.
 |
 |
 |
 |
|---|
 |
 |
 |
 |
|---|
 |
 |
 |
|---|
Upon a missed call or an unread message there is a notifier that presents a screen with button to run Messages or Phonelog application, or you can simply close the Notifier with the Top Shelf cross.
Post-Installation Script
After flashing your phone you can do some modification mentioned below in this manual. The shell commands are collected in a SHR post-installation that you can transfer to your phone via scp and execute it with sh. Please go through the script and check if the applications to be installed is that want you want. If do not understand, what is going on in the script, proceed with this manual and select every step manually. If understand the script it might save you some time:
 desktop#
 scp SHRpostinstallation.sh root@192.168.0.202/home/root/SHRpostinstallation.sh
Start the shell script on your phone with:
neo# sh /home/root/SHRpostinstallation.sh
First steps
Right after installation and first boot you might want to do a few initial steps:
Network Connection
Establish network connection and SSH into your phone. The root account uses no password by default. You can establish connection either via USB to your desktop and enable NAT or you can connect through Wifi. If you use USB, some setup is required on the desktop side, please read USB_Networking. For Wifi, you can use Network Manager
GSM Network
Check if GSM is working correctly - observe the GSM gadget in the Top Shelve and see reported signal of your GSM operator. If GSM Gadget seems not be running, click Settings and later on Phone. Move GSM Antenna to On.
Audio: Volume
Check and set call volume - this is handled by alsa state files in /usr/share/shr/scenarii/ . To customize speaker volume edit /usr/share/shr/scenarii/gsmhandset.state and change control 4. Values between from 105 to 120 might be sufficient:
vi /usr/share/shr/scenarii/gsmhandset.state
	control.4 {
		comment.access 'read write'
		comment.type INTEGER
		comment.count 2
		comment.range '0 - 127'
		iface MIXER
		name 'Speaker Playback Volume'
		value.0 116
		value.1 116
	}
Should you want to alter more parameters be aware that each file is a set of value for the 94 parameters. Some of the important ones are:
Control 48: internal mic of the tel (set to 2 or 3)
Control 4 : internal speaker (set from 110 to 120)
Control 49: headset mic
Control 3 : headset speaker
Set Regional Codes
For the default SHR phone applications to be able to correctly parse incoming calls/messages and match them with your contacts, you will need to edit the following file:
vi /etc/phone-utils.conf
And change the file to reflect your country and area, example for Czech republic:
[local]
international_prefix = 00
national_prefix = 0
#for the cz
country_code = 42
area_code = 0
Another example:
5667
0-179-5667
00-49-179-5667
+49-179-5667
are equivalent numbers for German O2 service number ("-" for clarity only). So
international_prefix = 00
national_prefix = 0
country_code = 49 (without any leading "00" or "+"!)
for area code it seems wise to use "179" here, though that's the GSM-network code, not the code of your geographical area.
area_code = 179
Initializing the opkg database
Initialize the opkg database in order to install some applications from SHR repositories or from other sources, for example [opkg.org]. While still being online, you need to first run
opkg update
Searching in the opkg database can take a long time. You can speed things up by dumping the database into a file and grepping it through.
Do this only once or after every opkg update:
opkg list > packages.txt
Then you can search quickly for package name, for example for navit:
grep navit packages.txt
In the 20090808 Image, opkg update does not work you will get: -sh: opkg: not found.
There is a missing opkg symlink to opkg-cl. this is fixed in the SHR repositories.
To update:
opkg-cl update
And to upgrade
opkg-cl upgrade
opkg should work fine now.
SwapSpace
- Main article: SwapSpace
When the RAM is used up applications get killed. This is particularly bad while doing opkg upgrade. Therefore you might want to create a swap partition.
WARNING: this mights kill your SD card, since there might be a lot of read/writes to the same spot. (all recent tests failed to harm SD cards by torture write tests, so probably you just shouldn't worry)
dd if=/dev/zero of=/swapfile bs=1024 count=65536
Add a line to fstab so next time you boot there will be swap
echo "/swapfile swap swap defaults 0 0">> /etc/fstab
Make swap
mkswap /swapfile
Make the swap file work now:
swapon /swapfile
Changing root password
SHR is shipped without root password (just press enter)
This is very dangerous if you connect using wifi, or USB. You need to activate the root password:
passwd
then type your selected password (2 times)
A much more convenient way might be to install your public-key to ~/.ssh/authorized_keys. For running
cmd | ssh root@neo anycommand
from your host this might be even mandatory, e.g if you want to pipe anything to the ssh.
Locate lost phone by GPS
To locate your phone in case of loss or theft by getting SMS with GPS location install sms-sentry:
opkg install sms-sentry
Then, upon sending an SMS with the text sentry:location to your phone, the phone will turn on GPS, wait for a fix and send back an SMS with the current location.
openBmap and Cellhunter are projects with the objective to collect GPS location of GSM network cells. If this project is finished then SMS-sentry could send the a rough location just by identifying the current distances (strength of signal) to the available GSM network cells, even when the GPS satellites are not available (e.g. in a house).
Localization

You can change the language of the SHR desktop environment by using the Settings of Illume. For Example, for Czech language: in the Illume top shelf go to Wrench (Settings) -> Language -> Language Settings -> and choose: Čeština. If your language is not in the menu you can install by using opkg.
You can list all available languages by running:
opkg list | grep glibc-locale-
And install the language of your choice (for example czech):
opkg install glibc-locale-cs
After this, the Language Settings of Illume will offer Czech.
This will localize the Illume environment and will also set correct lang environment variable. If you wish to have translations for other applications, you need to install them again (presuming they are available):
This will install czech localisation for SHR phone applications, SHR Settings and TangoGps:
opkg install libframeworkd-phonegui-efl-locale-cs shr-settings-locale-cs tangogps-locale-cs
For localized terminal environment (ssh login) set lang variables set /etc/profile, example for Czech language:
export LANG=cs_CZ
export LC_ALL=cs_CZ
The Illume keyboard offers english dictionary correction by default. You can list all the dictionaries available for installation:
opkg list | grep illume-dic
If your language is not available and english is bothering you, you can set an empty dictionary:
echo "" > /usr/lib/enlightenment/modules/illume/dicts/None.dic
By using it, it will get filled by the words you use and after time will start helping and correcting your typing.
Date and time
The local timezone is automatically retrieved from the GSM network. Date and time are automatically set from GPS or Network. The easiest way of setting the time for the first time is to run TangoGps (GPS & Map icon) and obtaining GPS fix. Time will then be set automatically after several minutes.
Time can set time also manually.
Via SHR-Settings -> Date/time -> Set time
From linux based desktop:
ssh root@192.168.0.202 "date -u -s `date -u +%m%d%H%M%Y.%S`"
You can also set the hardware clock to the system time:
hwclock --systohc
It is possible to instruct framework on how to set the time and timezone in /etc/frameworkd.conf :
[otimed]
# a list of time/zone sources to use or NONE
timesources = GPS,NTP
zonesources = GSM
# use an ip address here, otherwise DNS resolution will block
ntpserver = 134.169.172.1
To disable automatic date/zone settings, simply create an empty [otimed] section in /etc/frameworkd.conf
File transfer
After you have established network connection, it is very easy to access and transfer files. The easiest solution is to use Konqueror or Nautilus on your desktop computer and type the following on your location bar. This should provide you with a view of the client's file system on Konqueror or Nautilus and you can easily drag-drop and copy-paste files.
sftp://root@192.168.0.202
Data synchronization


You can synchronize your contacts and appointments data with various sources. The sync can by done by program called PISI . SIM contacts and calendar entries are currently possible to sync on SHR. You can also synchronize OPIMD contacts, these data are however so far no used in the current shr phone applications, but are used by for example Litephone.
For calendar install dates
opkg install dates
Supported Contacts data sources:
- SIM via DBUS (e.g. SHR)
- QTopia address book (e.g. OM 2008.12)
- LDAP (read only)
- VCF files (local / webdav)
- Google contacts
- OPIMD
Supported Calendar data sources:
- Google calendars
- ICalendar files (local / webdav)
To install PISI, run
|
opkg install http://www.opkg.org/packages/1_python-vobject_0.8.1_armv4t.ipk http://www.opkg.org/packages/0_python-webdav_0.1.2_armv4t.ipk python-sqlite3 python-pygtk python-pygobject python-pycairo python-netserver python-netclient http://www.opkg.org/packages/1_python-gdata_1.3.0_armv4t.ipk python-misc http://www.opkg.org/packages/0_python-ldap_2.3.6_armv4t.ipk http://www.opkg.org/packages/1_python-dateutil_1.4.1_armv4t.ipk http://www.opkg.org/packages/openldap_2.3.43_armv4t.ipk http://projects.openmoko.org/frs/download.php/891/pisi_0.4.5_armv4t.ipk
|
|---|
Configuration example, .pisi/conf to sync contacts and calendar with google calendar and contacts with google mail:
[googleCalendar]
description=My Google Calendar
module=calendar_google
user=user@gmail.com
password=secret
calendarid=user@gmail.com

[pimlicodates]
description= Pimlico Dates
module=calendar_ics
path=/home/root/.evolution/calendar/local/system/calendar.ics
postprocess=killall e-calendar-factory

[googlecontacts]
description=Google Contacts Account
module=contacts_google
user=user@gmail.com
password=secret

[remoteIcs]
description= Remote ICS on Webdav
module=calendar_remoteics
url=http://webdav.davserver.net/private/pim/
file=remotecalendar.ics
username=<LOGIN>
password=<PASSWORD>

[shrsim]
description=SHR SIM Card Contacts
module=contacts_dbussim
max_simentries = 250
simentry_name_maxlength=18
Another way of importing contacts via Vcard file is possible with this script written by Zem.
Reporting bugs
SHR is a work in progress. If you experience issues, please report them back to SHR. With your report provide logs from
/var/log/ophonekitd
/var/log/frameworkd
To report a bug, please go to http://shr-project.org/trac/report
Check if the bug is already reported. If not, add a ticket, be as much precise as you can in the title and the description, in what circumstances the issue happened and so on.
Navit is a car navigation system with routing engine. It can calculate a route and do on screen and voice road navigation. Maps need to be downloaded beforehand, please check Navit website. You can get Openstreetmaps through Navit map extractor, after you download the map it needs to be specified in the .navit/navit.xml file.
Add opkg feed
To install navit as a car navigation system on your phone you have to add the feed for the installer opkg
http://download.navit-project.org/navit/openmoko/svn/
You can do this by:
echo src navit http://download.navit-project.org/navit/openmoko/svn > /etc/opkg/navit-feed.conf
opkg update
Install Navit:

opkg install navit
Navit will be auto-updated when you run opkg upgrade later.
Navit on SHR has in the currently available version (08/2009) a libgps problem. You solve this by:
opkg install libgps17
ln -s /usr/lib/libgps.so.17 /usr/lib/libgps.so.16
Install Maps
Use Navit pre-processed OSM maps. With your browser on desktop:
- Navigate to the region you want,
- mark a rectangle for your map (e.g. for Germany) and click select the rectanglular map.
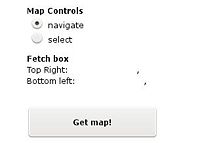 Download OpenStreetMaps
- then click on download and save the file to country.bin (e.g. germany.bin) on your desktop computer.
- copy the file to on your phone. Because of the size of the maps you copy map to the Micro-SD card on your phone. Create a directory for the maps and copy the files from desktop to phone:

mkdir /media/card/maps
scp germany.bin root@192.168.0.202:/media/card/maps
- Create a directory .navit and copy the navit.xml to this directory:
mkdir /home/root/.navit
cp /usr/share/navit/navit.xml /home/root/.navit/navit.xml
- Add and enable the map for the application in navit by changing the lines (at approx line number 370)
<mapset enabled="yes">
   <map type="binfile" enabled="yes" data="/media/card/maps/*.bin"/>
</mapset>
You can explicitly mention the downloaded maps in the mapset, e.g.:
<mapset enabled="yes">
   <map type="binfile" enabled="yes" data="/media/card/maps/germany.bin"/>
   <map type="binfile" enabled="no"  data="/media/card/maps/france.bin"/>
</mapset>
Disable unused mapset sections by setting enabled to no, e.g. the pre-installed sample maps at line 370 in navit.xml.
<mapset enabled="no">
   <xi:include href="$NAVIT_SHAREDIR/maps/*.xml"/>
</mapset>
Start Navit on your phone for your first test. For further configuration details see OpenMoko Article for Navit or the project website of Navit-Project.
Navit tends to depend on speech-dispatcher and after a suspend, the phone does not ring anymore for incoming calls or messages, it only vibrates. To correct this remove speech-dispatcher:
opkg remove -force-depends speech-dispatcher
SHR Settings

SHR Settings is the main setting application of SHR. It provides an easy way of setting up your phone to your liking - from phone related settings, to requesting resources in order to prevent screen dim or suspend (for example while using GPS).
Please refer to this wiki page about a better way to manage preventing screen dim or suspend.
While some settings are persistent over reboots, others are not.
Main Screen
The main screen is divided into eight categories, which contain several modules. Every SHR Settings module has a specified task - for example controlling the GSM antenna power, setting the time etc.
Settings: Phone
Here you can set if the GSM antenna is on and if your phone number is shown when you call someone.
GSM In GSM settings you can turn off and on GSM module. After turning off antenna, whole GSM modem is turned off.
To list available providers, click on Operators button. Scanning can take some time. After a while, a list of operators should pop up.
You can't connect to operators marked [forbidden]. After a connection failure, a message is displayed.
Selecting an operator from the list also changes modem registration mode to manual. It won't register to other network, even if some is available and has better signal strengh. To return to automatic mode, click "Automatic" button in operator list.
Call

|
 |
|---|
You can set if your phone number should be displayed to other party. You can either depend on network decision ("By network") or force it manually ("Manual")
SIM
Here you can view some informations about your SIM card and clean phone and messagebooks.
Others
Profile
Here you can select the current profile, which the device should use to determine ring tone etc.
Current profile
Here you can adjust properties of the currently used profile. Available settings: ring tone, ring volume, ring vibration, ring loop, ring length, message tone, message volume, message vibration, message loop, message length.
To change the ring tone, click the "Change" button.
To use your own ring tone, place it in /usr/share/sounds directory.
After selecting a sid tune as the ring tone, there are available controls to select tune number from the file.
This is changing settings in /etc/freesmartphone/opreferences/conf/phone/default.yaml
ring-volume # Ring Volume control 0 (mini) to ? maxi)
ring-length # min time for ringtone. Must be greater than the duration of you ringtone
ring-loop # define the number of loop of ringtone to play
ring-tone: "ringtone_ringnroll.ogg" # .ogg example
ring-tone: "Arkanoid_PSID.sid" # .sid example, use default tune
ring-tone: "Arkanoid_PSID.sid;tune=2" # .sid example, plays the second tune of that
If you like to test a .sid you can play it using this command on the FR:
gst-launch filesrc location=Arkanoid_PSID.sid ! siddec tune=2 ! alsasink
Note that it's a ! used and not a | to construct the gstreamer pipe command.
 |
 |
|---|
Settings: Connectivity
 |
 |
|---|
WiFi
With the "WiFi radio" toggle you can set, if the wifi module is powered. WiFi radio has to be turned on before trying to connect to a WiFi network, unless you try to connect through Mokonnect which is capable of powering it up.
GPRS
To enter APN, login and password fields, just click on the actual value (default: "internet"). Keyboard will pop up. If you don't know APN, login and passwork, ask your provider.}}
| NOTE: You can also use Mokonnect to manage your GPRS connection |
To connect to the GPRS network, just click the "Connect" button. Entered values will be saved after successful connection.
USB
With this toggle you can switch USB port between device (Neo to PC) or host (device to Neo) modes.
Bluetooth
To power up Bluetooth module, switch the "Bluetooth radio" toggle to "On". After that, the "Visibility" toggle should arrive - set it to "On" if you want your FR to be visible by other Bluetooth devices on scanning.
Settings: GPS
 |
 |
|---|
GPS
By default, GPS is turned on only when requested (when you turn on TangoGPS, Navit, omgps or other GPS app). That state corresponds to "Auto" setting. After changing to "Manual", you can force set it to on or off.
GPS information
This page can be used to monitor GPS status. If some value isn't known, then "unknown" is displayed.
You can also view information about every visible satellite and check, which are used for getting a fix. To do that, click "Satellite details".
If you experience problems with GPS, turn it off, click "Remove AGPS data" and reboot your Neo.
Settings: Date/time

Time
Here you can view and set the time. By default, the time is just displayed, To adjust it, click on "Set time".
After finishing adjusting, click the "OK" button.
Date
This module displays the current date.
Settings: Power
Battery
This module displays informations about battery state - charge, voltage, remaining time etc. To update the data, click the "Update" button.
Here you can also force enable 500mA charging.
Display
With this slider you can easily set the backlight brightness.
| NOTE: This setting isn't permanent over sessions. At boot backlight is set back to 100%. |
Power
 |
 |
|---|
Here you can turn on or off automatic dimming or suspend after idle timeout (see: Timeouts module)
Timeouts
Here you can set up values of idle timeouts used by the device. Timeouts are reached in this order: idle -> idle dim -> idle prelock -> lock -> suspend. Idle, idle prelock and lock aren't used by default in SHR at the moment. This setting changes parameters in /etc/frameworkd.conf :
[odeviced.idlenotifier]
suspend = 20
lock = 2
idle_prelock = 12
idle = 10
idle_dim = 20
Settings: Services
 |
 |
|---|
Here is listed every interesting script from /etc/init.d/ directory.
After clicking on one, you can either start, restart or stop the service and view the result.
Settings: Others
 |
 |
|---|
Splash
With this selector you can select the theme used by shr-splash at boot and shutdown. After clicking "Preview", the selected boot image will be displayed for 5 seconds.
PIM
Module used by opimd developers. Doesn't have influence on behaviour of default SHR image.
Every opimd domain has different backends to store its data. The domain reads data from every backend and writes data to the default backend. So with the selector in shr-settings you can choose the backend that stores newly generated data, it doesn't copy or move existing data to a different backend.
Userspace backups
Here you can either archive or restore your files and configurations.
Image information
This module contains basic information about the installed image - name of buildhost, used revision, branch and time of build.
Theming

Find available themes by running
opkg list | grep theme-illume
install it by
opkg install e-wm-theme-illume-sixteen elementary-theme-sixteen
http://opkg.org has a very fast theme called nEo
opkg install http://www.opkg.org/packages/e-wm-theme-neo_0.2_armv4t.ipk
opkg install http://www.opkg.org/packages/elementary-theme-neo_0.2_armv4t.ipk
opkg install http://www.opkg.org/packages/etk-theme-neo_0.2_armv4t.ipk
opkg install -force-overwrite http://www.opkg.org/packages/libframeworkd-phonegui-efl-theme-neo_0.2_armv4t.ipk
If you also want the GTK+ Applications to fit in with the rest of the Systems look execute
opkg install http://www.opkg.org/packages/gtk-theme-neo_0.1_armv4t.ipk
For a completely monolithic look additionally execute
opkg install -force-overwrite http://www.opkg.org/packages/gpe-theme-neo_0.1_armv4t.ipk
opkg install http://www.opkg.org/packages/icon-theme-neo_0.2_armv4t.ipk
Please observe the command line output when installing these themes, since it will tell you how to activate the themes.
| NOTE: some of the theme packages have to be reinstalled after an opkg upgrade. |
Reverting back can be done by
opkg install e-wm-theme-illume-sixteen shr-theme-gtk-e17lookalike  -force-reinstall
opkg install libframeworkd-phonegui-efl0 e-wm-theme-default etk-theme-shr shr-theme -force-reinstall
FSO Resources
FSO is in control of each device. These are called resources. If the software wanting to use the device is capable of requesting this resource via d-bus, FSO will do this, otherwise you might need to power the device manually. After the requested resource is released, FSO will power it down. Manual resource request can be done through SHR Setting or you can use fsoraw command. (Using fsoraw is faster and better then running dbus commands)
opkg install fsoraw
Example of usage fsoraw:
fsoraw -r Display mokomaze
See FSO Resources for more details on using the following resources:
Wifi
Unless this resource is enabled you've no eth0 and wifi module is completely un-powered. Use the network manager to set up networks, Mokonnect will power Wifi up automatically when needed.
Bluetooth
You need to have this resource requested to have bluetooth module powered.
GPS
The fso-gpsd is a daemon waiting for gsmd connections, automatically powering the device on and off. When a connection exists, it powers up the GSM. In SHR Settings you can switch GPS completely off SHR Settings -> GPS -> Manual > Off
GSM
You need to have this resource requested to have GSM module powered.
Display
While this resource is requested the display won't be blanked and suspend is disabled.
CPU
Default rules.yaml checks for this resource to disable automatic suspend when it's requested. While this resource is kept suspend is disabled (but screen can be blanked).
Test
A test resource
Network manager
While there are several ways of networking - Wifi, USB, Bluetooth and Gprs - By default, USB networking is enabled in /etc/network/interfaces.
Enhanced configuration is possible through direct editing of /etc/network/interfaces or through Mokonnect.
The connmand daemon with Mokonnect are the recommended user level applications for setting up networking. At the moment, Mokonnect can manage USB, Wifi and Gprs connections, as well as routing and NAT. The Wifi device is not required to be manually turned on via SHR-Settings as Mokonnect will automatically enable the device when needed and disable it after use.
 |
 |

|
|---|
Bluetooth
Bluetooth can be used for several different applications - file transfer, networking, HIDD, music playing (A2DP), calling etc. In some occasions, the devices need to be authorized - paired. At the moment, support for some bluetooth functions is better than for others - it is possible to do all mentioned above with the notice that phone calls with bluetooth headset are always routed to the bluetooth even if it is not around, making it quite difficult to use.
Don't forget you need to turn the bluetooth radio on in SHR Settings -> Connectivity -> Bluetooth Radio: On, where you can also make the bluetooth device visible.
SHR uses bluez4 which is completely different from bluez3. The bluetoothd is taking care of most of the bluetooth now. Please see Manually using Bluetooth for detailed information about using bluetooth and also for a list of supported devices.
OBEX file transfer
There are several obex programs allowing file transfer, all in console at the moment. Obexpush installs obextool, and opd daemon:
opkg install obexpush
Default receiving path (editable in /etc/default/opd_args ) does not exist, so create it
mkdir /var/obexpush
Files are then received automatically, no notice, no confirmation... they just silently appear in /var/obexpush
To send some files, first scan for devices:
hcitool scan
Scanning ...
	00:16:41:F5:A5:BC	laptop
Then send it onto bt address found in the scan:
obextool push image.jpg 00:16:41:F5:A5:BC 10
Connect Bluetooth keyboard
hidd --search
Pairing
This comes from Manually_using_Bluetooth#Once_Again.2C_Bluetooth_Headset_on_Freerunner
Now, you must pair the bluetooth headset with your phone. Make sure the bluetooth chip is powered up (can be done through the Connectivity section in the SHR-Unstable settings manager) and that bluetoothd is running:
/etc/init.d/bluetooth start
Now, to actually pair the bluetooth headset, you will need the simple-agent script. If you already have it, excellent. If you, like me, do not, then you can get it here: http://dl.getdropbox.com/u/453116/simple-agent
Put it in /usr/bin/ and run ===chmod a+x /usr/bin/simple-agent===
Now put your headset into pairing mode and run
hcitool scan
Find your headset and use its address in the command
simple-agent hci0 XX:XX:XX:XX:XX:XX
If you give a third parameter (what it is doesn't matter) to simple-agent, it will disconnect then reconnect to the headset (reset pairing).
GSM phone calls with bluetooth headset
Your bluetooth headset device must be paired first.
Configuring bluez
Older SHR releases you need to uncomment SCORouting=PCM setting in [General] section of
/etc/bluetooth/audio.conf
like this:
# SCO routing. Either PCM or HCI (in which case audio is routed to/from ALSA)
# Defaults to HCI
SCORouting=PCM
do not forget to restart bluetoothd after that.
/etc/init.d/bluetooth stop
/etc/init.d/bluetooth start
Configuring FSO
Now we must tell frameworkd that you have a bluetooth headset. Headset parameters should be set in
/etc/freesmartphone/opreferences/conf/phone/default.yaml
Parameters bt-headset-enabled and bt-headset-address (see opreferences/schema/phone.yaml for semantics).
You need to restart FSO for the changes to take effect.
/etc/init.d/frameworkd restart
example of my /etc/freesmartphone/opreferences/conf/phone/default.yaml:
message-length: 7
message-tone: notify_message.wav
message-vibration: 1
message-volume: 10
ring-loop: 1
ring-tone: ringtone_ringnroll.wav
ring-vibration: 1
ring-volume: 10
bt-headset-enabled: 1
bt-headset-address: 00:09:DD:31:92:98
Re-Connecting the bt device
You might need to get the bluetooth headset connected manually on the beginning and also after suspend:
mdbus -s org.bluez /org/bluez/`pidof bluetoothd`/hci0/dev_xx_xx_xx_xx_xx_xx org.bluez.Headset.Connect
where xx_xx_xx_xx_xx_xx is address of the device, for example:
mdbus -s org.bluez /org/bluez/`pidof bluetoothd`/hci0/dev_00_09_DD_31_92_98 org.bluez.Headset.Connect
Hopefully, your bluetooth headset now works. Good luck!
System Customizing
Changing the splash screen
list available splash screen themes
opkg list | grep splash-theme
and install one of the available themes
opkg install shr-splash-theme-dontpanic
Then go to SHR Settings -> Others -> Themes. Here you can preview installed themes and change the default one.
Enable mouse cursor
edit line 121 of /etc/X11/Xinit and erase -hide-cursor
ARGS="$ARGS -dpi ${DPI} -screen ${SCREEN_SIZE} -mouse tslib -root-ppm /usr/share/pixmaps/xsplash-vga.ppm vt1"
Improve speed of Elementary applications
Set the Elementary rendering engine used for Evas to x11-16 (Software X11 16bpp engine, may have bugs and will be lower quality, but faster):
echo -e "#!/bin/sh\n\nexport ELM_ENGINE=x11-16" > /etc/profile.d/set-elm-engine.sh
Additionally in the SHR-Unstable repositories there are theme packages optimized for 16bpp color. Both packages can be installed with the following command:
opkg install e-wm-theme-illume-sixteen elementary-theme-sixteen
You can then append the /etc/profile.d/set-elm-engine.sh with:
# Set Optimized theme
export ELM_THEME=sixteen
You can also then change Illume to use the sixteen theme by clicking the wrench->Look->Theme-illume-sixteen->OK. Then switch Illume to use the 16bpp Engine by clicking the wrench->Advanced(you will need to drag and slide the top menu)->Engine->Software_16->OK. This should give you a much faster interface without the low quality look the default SHR themes have at this lower color depth.
Read http://trac.enlightenment.org/e/wiki/Elementary
If you try to change Wallpaper or Theme and Illume keeps on crashing, it might be caused by the whole Illume running in Software_16 mode. Go to Illume Settings, slide the icon bar and select Advanced. There tap on Engine and select Software. After this, you can change your Wallpaper or Theme. Selecting Software_16 later on again will speed up the desktop's response (though causing it to be a bit uglier).
Speedup of suspend and wake up
I you are using Qi and installation on a µSD card, you can change the kernel parameter loglevel=1 1 in /boot/append-GTA02 . For u-boot and installation in nand just type
klogd -c 1
into the console. This saves you from 3 seconds worth of console output on every resume.
If you like the effect of this command and want it to be executed at every startup, you just have to log into your phone and type the following:
cat > /etc/init.d/resumespeedup << EOF
#!/bin/sh
/sbin/klogd -c 1
EOF
chmod +x /etc/init.d/resumespeedup
ln -s ../init.d/resumespeedup /etc/rc1.d/S06resumespeedup
ln -s ../init.d/resumespeedup /etc/rc2.d/S06resumespeedup
ln -s ../init.d/resumespeedup /etc/rc3.d/S06resumespeedup
ln -s ../init.d/resumespeedup /etc/rc4.d/S06resumespeedup
ln -s ../init.d/resumespeedup /etc/rc5.d/S06resumespeedup
Opimd utils
Opimd utils is a set of several testing scripts to play with the new opimd backends. It also provides opimd-messages program and mainly new opimd-notifier that is much better then the standard one.
opkg install opimd-utils
opkg upgrade issues
As opkg had some issues recently, installation might get broken due to that. You can fix it or prevent by using the following scripts
Safe update packages:
#!/bin/sh

opkg list_upgradable | awk '!/(kernel|Multiple)/ {print $1}' | \
	while read line; do
	echo "installing pack $line"
	opkg install $line -force-reinstall
done
Force reinstall all installed packages
#!/bin/sh

opkg list_installed | awk '!/(kernel|Multiple)/ {print $1}' | \
	while read line; do
	echo "installing pack $line"
	opkg install $line -force-reinstall
done
Random errors
No icons, no GSM functions etc. - this is mostly due to errors on your µSD card. Remove your card and fix it in card reader or by booting to another partition (nand) or by reboot and mount read only, then run fsck.
For reboot into nand and fix 1st partition of ext2 on your card
fsck.ext2 /dev/mmcblk0p1
Replace dropbear with openssh
Set password
passwd
Install ssh server (and sftp)
opkg install openssh-sshd openssh-sftp-server openssh-scp -force-depends
Remove dropbear and start openssh
screen
opkg remove dropbear -force-depends; /etc/init.d/sshd start
You will get disconnected from the ssh session, wait until keys get generated and log in again.
| NOTE: Remove old SSH Key from .ssh/known_hosts: On your Linux box you will find a file known_host in the subdirectory .ssh/ in you home directory. This contains a ssh key for the connection to your phone. If new keys are generated or if you flash your phone with SHR then you have to remove the line with openmoko or the IP-address of your phone from the file. Otherwise you might be able to login in again. |
Video playback
Install intone-video
opkg install elementary libsqlite3-0 http://www.opkg.org/packages/intone-video_0.11_arm.ipk
If intone complaints about missing libraries, please run
#!/bin/sh
cd /usr/lib
ls *ver-svn-02*|while read nombre
do
	final="`echo $nombre | sed s/-ver-svn-02/-ver-pre-svn-01/`"
	ln -s /usr/lib/$nombre /usr/lib/$final
done
On your desktop, encode your video:
mencoder video-file -ovc lavc -lavcopts vcodec=mpeg4:vhq:vbitrate=300 -vf scale=320:240,eq2=1.2:0.5:-.025,rotate=2 -oac mp3lame -lameopts br=64:cbr -o video-file-FR.avi
Adding your phone to your hosts
You can add your phone to your hosts file for a name resolving:
You can use the name neo if you added the host neo in /etc/hosts on your desktop computer (add the following line for host neo assuming that the IP-address of your phone is 192.168.0.202.
echo "192.168.0.202 neo neo" >> /etc/hosts
You can then access your phone like this:
ssh root@neo
Which is shorter than this:
ssh root@192.168.0.202
Installing Software
You can use opkg for installing software packages or you can try SHR Installer from http://git.shr-project.org/git/?p=shr-installer.git;a=summary . It requires packagekitd
opkg install packagekitd
If you wan to use opkg after you used the installer, make sure packagekitd is not running
killall packagekitd
Cool applications
SHR comes with only a few preinstalled applications but its repository provides more cool stuff. Also, there are applications that are not in SHR repos at the moment but can still be installed. The following few examples are here just to spark your interest:
SHR Launcher

Launcher is an elementary based alternative home screen application and event notifier for SHR. It displays current time, has a user tweak-able launcher with categories and features missed calls and messages applets.
opkg install libsqlite3-0 http://www.opkg.org/packages/launcher_0.30_arm.ipk
If you don't see some icons, copy all icons from /usr/share/icons/shr/86x86/apps/* to /usr/share/pixmaps.
For PIM applications you can get dates for calendar, tasks for todos, neote for notes:
opkg install dates tasks
opkg install http://neote.googlecode.com/files/neote_0.2.0-r0_all.ipk
Paroli is available in SHR images, you can install it:
opkg install paroli
fix the conf files that the paroli installer messes with (might get fixed in the next couple of days.)
cp /etc/old_frameworkd.conf /etc/frameworkd.conf
cp /etc/freesmartphone/oevents/old_rules.yaml /etc/freesmartphone/oevents/rules.yaml
now if you want to disable the shr phone apps without removing them comment all of the lines out in
/etc/X11/Xsession.d/89notifier and /etc/X11/Xsession.d/80ophonekitd
if you want the bind-home to ease upgrades add this line to fstab.
/media/card/bind-home /home/root none bind 0 0
You should now have a functional paroli on SHR setup. Once you have a working setup I would advise against doing opkg upgrades and only upgrade specific packages when needed.
GPE contacts saves the contacts in a SQLite database that can be synchronized with VCard files. Gpe-contacts don't allow you to dial directly via shr-dialer. Install gpe-contacts:
opkg install gpe-contacts
After installation you'll find to icons with MyVCard. If you want to remove it, delete the file /usr/share/applications/edit-vcard.desktop
Litephone

Litephone is a new alternative set of phone applications written in Qt. In it's single application interface it provides basic phone functionality (contacts, calls, messages, phone log, settings). Its main advantage is that it uses opimd for storage of the user data.
opkg install http://pvtrace.com/litephone/libqtcore4_4.4.3-r3_armv4t.ipk
opkg install http://pvtrace.com/litephone/libqtxml4_4.4.3-r3_armv4t.ipk
opkg install http://pvtrace.com/litephone/libqtdbus4_4.4.3-r3_armv4t.ipk
opkg install http://pvtrace.com/litephone/libqtgui4_4.4.3-r3_armv4t.ipk
opkg install http://pvtrace.com/litephone/qt4-x11-free_4.4.3-r3_armv4t.ipk
opkg install http://pvtrace.com/litephone/litephone_0.0.1-r3_armv4t.ipk
Mokomaze is an eye-candy game using accelerators embedded in your device.
opkg install mokomaze
If you tweak the exec procedure in /usr/share/applications/mokomaze.desktop into this:
fsoraw -r Display mokomaze
the screen will not blank while playing.
Cellhunter is a game to collect information about mobile phone cells. This information can later be used to roughly determine your position without powering on the GPS chip. CellHunter homepage
opkg install cellhunter
OMGps and TangoGPS are GPS application showing you your position on a map (Openstreetmap, Google maps etc.). You can track your position, save it and use later, save and view points of interest, images or measure your trip. OMGps allows you to overlay different maps on top of each other, set GPS into different modes (walking, car, flying). Maps are downloaded online and used even in offline.

|
C  |

|
|---|
Screenshots can be made with gpe-scap (available by default in SHR full image). To take a screenshot, run gpe-scan from shell while connected in via ssh.
Literki is a full qwerty keyboard with configurable layout, always transparent, therefore applications don't need to redraw screens and popup is therefore very fast. The keys are big enough for everyday use with your fat fingers. To pop up the keyboard: slide your finger upwards from the bottom right corner. To hide the keyboard: slide your finger down on the keyboard. Opkg page
opkg install http://pvtrace.com/literki_0.0.2-r3_armv4t.ipk