Work in progress. Comments here
SHR Introduction
SHR (Stable Hybrid Release) is a community driven distribution based on the FSO framework. SHR can use several different graphical toolkits, for example GTK or EFL. At first, SHR was introduced in order to use the Om 2007.2 GTK software in combination with the new FSO, but things have changed, software got developed further and development is still progressing.
TODO: Text from SHR, enhance.
SHR Specific
At this point, there are some applications and procedures that are purely specific to SHR and would not run on another distribution. For example the phone applications (Dialer, Messages and Contacts) and SHR Settings depend heavily on the ophonekitd daemon.
In sense of the underlying phone subsystem SHR is based on FSO so basically any application using FSO has a chance to run, should all required libraries be available. In the future, this will give a chance to some other GUI phone managers to be chosen from.
Installation
Getting SHR
GSM firmware
If you don't have Moko11 as your GSM firmware yet, you should update it: See GSM/Flashing
TODO: Include the full GSM upgrade procedure? Or perhaps as an addendum?
Boot loader
Recent bootloaders ensure proper kernel loading. qi is recommended but uboot is still fun optional and supported. The latest boot loader files are available at http://downloads.openmoko.org/distro/testing/
Installation on Flash
Installation on µSD Card
SHR version
To find out what version of SHR you have installed, please run
cat /etc/shr-version
or check SHR Settings -> Other -> Image information
Instalator
Running SHR
Booting
Press the power button shortly once to start the Freerunner. Booting splash screen will appear. First boot after new installation takes always a bit longer. Sometimes, it is recommended to reboot after this first boot, to make sure all packages got initialized properly.
Initial Setup
On the first boot, Setup is automatically initiated to walk the user through basic setup of the Enlightenment desktop environment. You are able to choose preferred language of the desktop environment, Illume SHR themed profile or select default menu (only one at the moment). On the Add icon screen you can add icons for some application. If you add a terminal based application like mplayer, you will see an icon but no application running upon click, as it will run in the background. Last screen allow settin up quick launch applications. TODO: what does quick launch do anyways?
First look
Phone applications
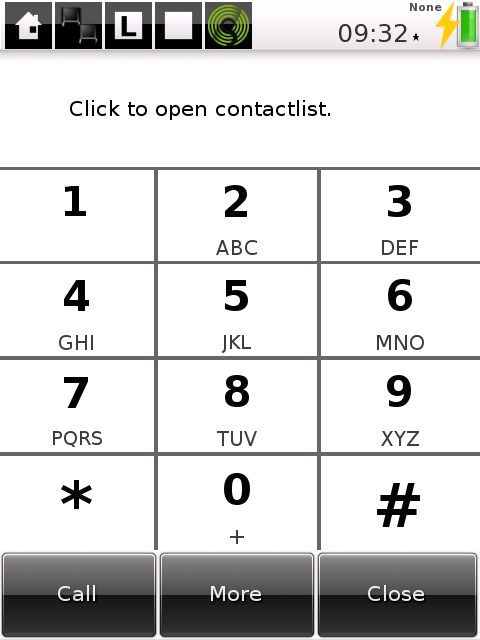
Dialer
Contacts

Contact options

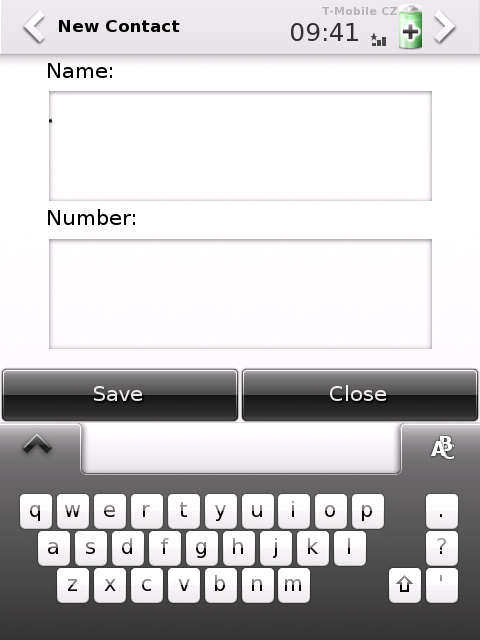
Add new contact
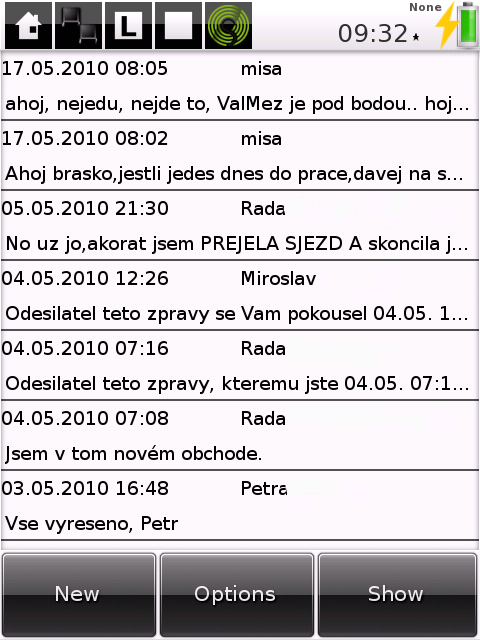
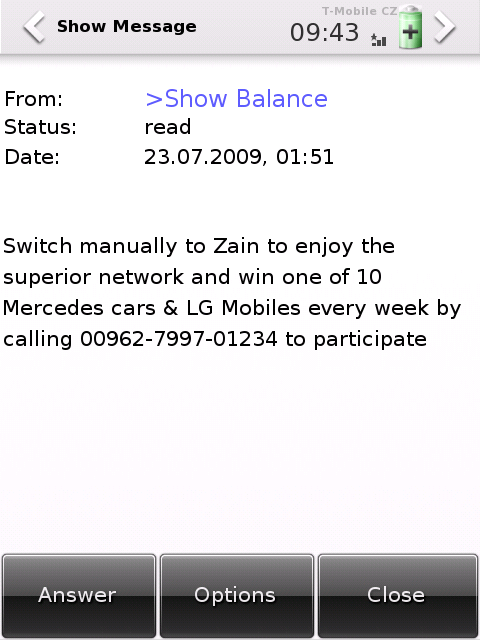
Messages
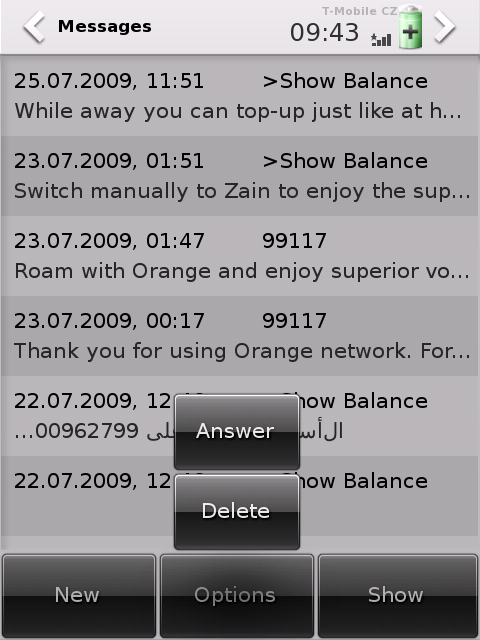
Messages options
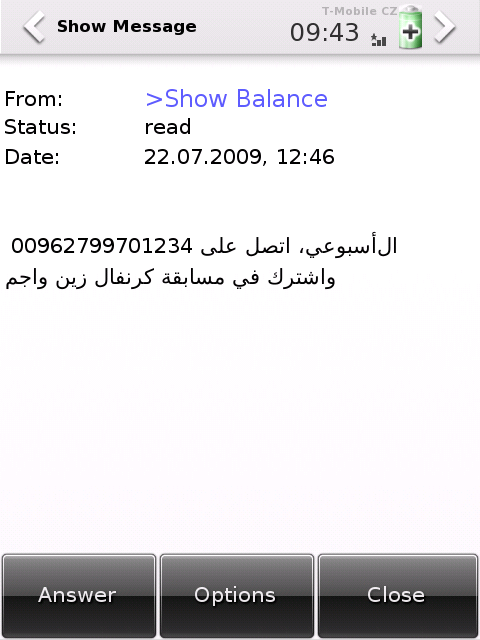
View message
Unicode characters are supported
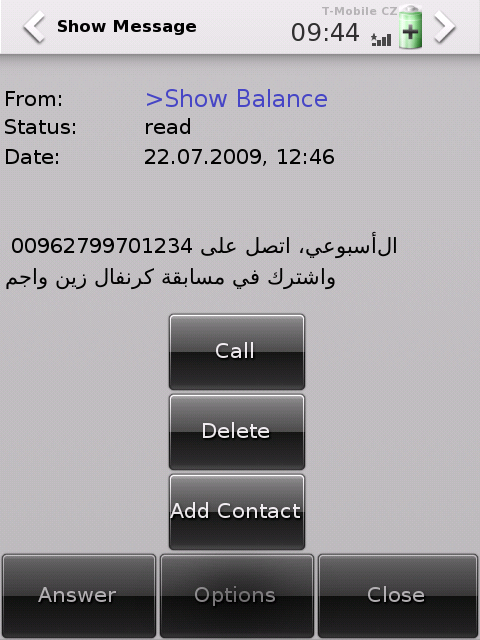
Message options
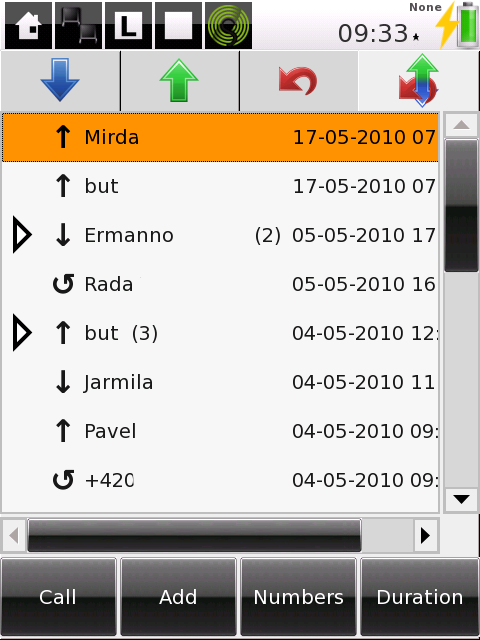
Phonelog
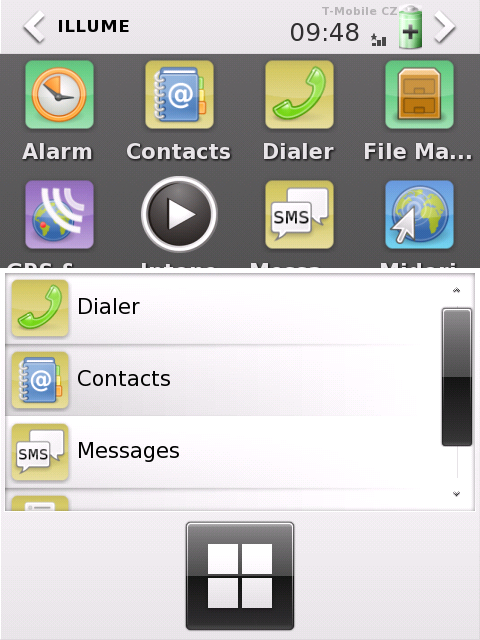
To switch between applications, use the task manager.

Localization
You can change the language of the SHR desktop environment by using the Settings of Illume. For Example, for Czech language: in Illume Top Shelve go to Wrench (Settings) -> Language -> Language Settings -> and choose: Čeština. If your language is not in the menu you can install by using opkg.
You can list all available languages by running:
opkg list | grep glibc-locale-
And install the language of your choice (for example czech):
opkg install glibc-locale-cs
After this, the Language Settings of Illume will offer Czech.
This will localize the Illume environment and will also set correct lang environment variable. If you wish to have translations for other applications, you need to install them again (presuming they are available):
This will install czech localisation for SHR phone applications, SHR Settings and TangoGps:
opkg install libframeworkd-phonegui-efl-locale-cs shr-settings-locale-cs tangogps-locale-cs
For localized terminal environment (ssh login) set lang variables set /etc/profile, example for Czech language:
export LANG=cs_CZ
export LC_ALL=cs_CZ
The Illume keyboard offers english dictionary correction by default. You can list all the dictionaries available for installation:
opkg list | grep illume-dic
If your language is not available and english is bothering you, you can set an empty dictionary:
echo "" > /usr/lib/enlightenment/modules/illume/dicts/None.dic
By using it, it will get filled by the words you use and after time will start helping and correcting your typing.
Date and time
Timezone is automatically retrieved from the GSM network. Date and time are automatically set from GPS or Network. The easiest way of setting the time for the first time is to run TangoGps (GPS & Map icon) and obtaining GPS fix. Time will then be set automatically after several minutes.
Time can set time also manually.
Via SHR-Settings -> Date/time -> Set time
From linux based desktop:
ssh root@192.168.0.202 "date -u -s `date -u +%m%d%H%M%Y.%S`"
You can also set the hardware clock to the system time:
hwclock --systohc
SHR Settings
SHR Settings
SHR Settings is the main setting application of SHR. In the background it uses FSO specific dbus calls as well as low level commands. The graphical interface is Elementary-Python based. It provides an easy way of setting up your phone to your liking - from phone related settings, to requesting resources in order to prevent screen dim or suspend (for example while using GPS).
While some settings are persistent over reboots, other are not.
TODO: list persistent/non persistent settings, or make a note at each section
SCREEN
Main Screen
Main screen is divided into few categories, which contain modules. Every SHR Settings module has specified task - control GSM antenna power, set actual time etc.
Phone
SCREEN
GSM
In GSM settings you can turn off and on GSM module. After turning off antenna, whole GSM modem is turned off.
To list available providers, click on Operators button. Scanning can take some time. After while, list of operators should pop up.
SCREEN
You can't connect to operators marked as [forbidden]. After failed connect, message is displayed.
SCREEN
Selecting operator from list also changes modem registration mode to manual. It won't register to other network, even if some is available and has better signal strengh. To return to automatic mode, click "Automatic" button in operator list.
Call
You can decide, if your phone number should be displayed to other party. You can either depend on network decision ("By network") or force it manually ("Manual")
SCREEN
SIM
Here you can view some informations about your SIM card and clean phone and messagebooks.
SCREEN (?)
Profiles
SCREEN
Profile
Here you can select current profile, which device should use to determine ring tone etc.
Current profile
Here you can adjust properties of currently used profile. Available settings: ring tone, ring volume, ring vibration, ring loop, ring length, message tone, message volume, message vibration, message loop, message length.
To change ring tone, click on "Change" button.
SCREEN
To use your own ring tone, place it in /usr/share/sounds directory.
After selecting sid tune as ring tone, there are available controls to select tune number from file.
SCREEN
Connectivity
SCREEN
WiFi
With "WiFi radio" toggle you can set, if wifi module should be powered. WiFi radio has to be turned on before trying to connect to WiFi network.
TODO: obsolete, Kmokonnect turns wifi on automatically
GPRS
To enter APN, login and password fields, just click on actual value (default: "internet"). Keyboard will pop up.
NOTE: If you don't know APN, login and passwork, ask your provider.
TODO: obsolete, Kmokonnect provides gprs support now
SCREEN
To connect to GPRS network, just click "Connect" button. Entered values will be saved after successful connection.
SCREEN
USB
With this toggle you can switch USB port between device (Neo to PC) or host (device to Neo) modes.
Bluetooth
To power up Bluetooth module, swith "Bluetooth radio" toggle to "On". After that, "Visibility" toggle should arrive - set it to "On" if you want your FR to be visible by other Bluetooth devices on scanning.
GPS
SCREEN
GPS
By default, GPS is turned on only when requested (when you turn on TangoGPS, Navit, omgps or other GPS app). That state corresponds to "Auto" setting. After changing to "Manual", you can set it on all the time.
GPS information
This page can be used to monitor GPS status. If some value isn't known, then "unknown" is displayed.
SCREEN
You can also view information about every visible satellite and check, which are used for getting fix. To do that, just click "Satellite details".
If you experience problems with GPS, turn it off, click "Remove AGPS data" and reboot your Neo.
Date/time
SCREEN
Time
Here you can view and set actual time. By default, time is just displayed, To adjust it, click on "Set time".
SCREEN
After finishing adjusting, click "OK" button.
Date
This module displays current date.
Power
SCREEN
Battery
This module displays informations about battery state - charge, voltage, remaining time etc. To update data, click "Update" button.
Here you also enable 500mA charging with dumb chargers.
Display
With this slider you can easly tweak backlight power.
NOTE: This setting isn't pernament over sessions. At boot backlight is set back to 100%.
Power
Here you can turn on or off automatic dimming or suspend after idle timeout (see: Timeouts module)
SCREEN
Timeouts
Here you can set up values of idle timeouts used by device. Timeouts are reached in this order: idle -> idle dim -> idle prelock -> lock -> suspend. Idle, idle prelock and lock aren't used by default in SHR at the moment.
Services
SCREEN
Services
Here is listed every interesting script from /etc/init.d/ directory.
SCREEN
After clicking on some, you can either start, restart or stop service and view result.
Others
SCREEN
Splash
With this selector you can select theme used by shr-splash at boot and shutdown. After clicking "Preview", selected boot image will be displayed for 5 seconds.
PIM
Module used by opimd developers. Doesn't have influence on behaviour of default SHR image.
Userspace backups
Here you can either archive or restore your files and configurations. (TODO)
SCREEN
Image information
SCREEN
This module contains basic information about installed image - name of buildhost, used revision, branch and time of build.
Theming
Networking
While there are several ways of networking - Wifi, USB, Bluetooth and Gprs - By default, USB networking is enabled in /etc/network/interfaces.
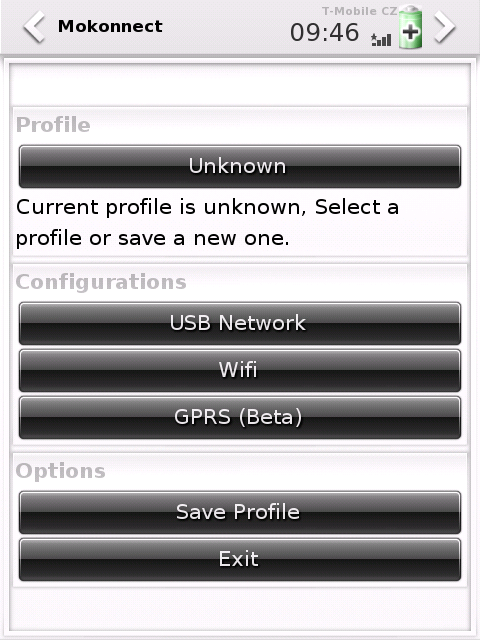
Enhanced configuration is possible through direct editing of /etc/network/interfaces or through Mokonnect.
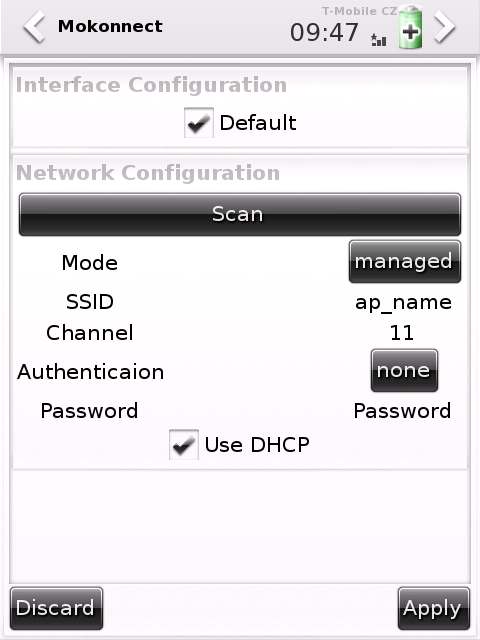
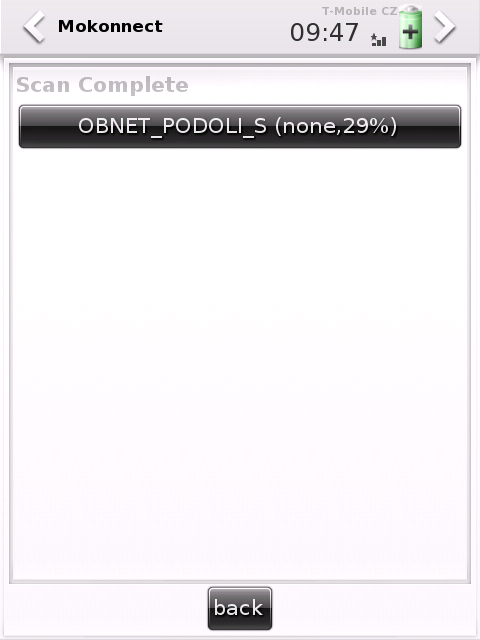
Connmand daemon with Mokonnect are the recommended user level applications for setting up networking. At the moment, Mokonnect can manage USB, Wifi and Gprs connections. Wifi device is not required to be manually turned on via SHR-Settings as Mokonnect will automatically enable the device when needed and disable after use.
TODO: screenshots, supported encr. wifi
System Customizing
Installing Software


