Freerunner Alternative Case Designs
From Openmoko
Megalomaniac (Talk | contribs) |
|||
| Line 34: | Line 34: | ||
'''1. Prepare your image''' | '''1. Prepare your image''' | ||
| − | Download the template file for Gimp and load it. | + | Download the [http://www.opkg.org/specials/template.xcf template file] for Gimp and load it. |
Now you have to put the image you want to print on a new layer at the bottom (you may remove the «Place your picture here» layer first). Move the image so it fits for you. | Now you have to put the image you want to print on a new layer at the bottom (you may remove the «Place your picture here» layer first). Move the image so it fits for you. | ||
Revision as of 14:36, 30 October 2008
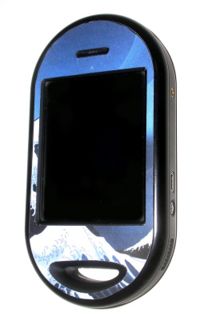
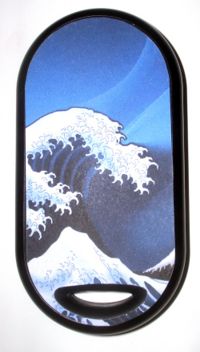
Looking at my Freerunner I tought that usual black case is kind of boring. So I decided to make it a bit more colorful.
I looked around for some printable self adhesive foil that is easy to remove (without debris) and not too expensive. Finally I found this one on eBay:
This is a german shop. I ordered some to Switzerland and paid about 5 Euros for shipping. Unfortunately it only ships inside Europe. So if you life outside Europe you have to search your own material!
It should work with any kind of printable self adhesive foil. Just be sure you can remove it easily. I used uncoated foil. I think coated foil reflects too much...
To see the result of this litte tutorial look at the pictures below.
Let's get started
You are using this tutorial at your own risk! I won't take any responsibility if your device gets damaged!
Needed materials
You need the following items:
- Your beloved Freerunner
- The Gimp
- An image you want to «print onto your Freerunner»
- Ink-Jet/Laser Printer
- Printable self adhesive foil
- Scissors/Cutter/Ruler
- A steady hand
I think that's it...
1. Prepare your image
Download the template file for Gimp and load it.
Now you have to put the image you want to print on a new layer at the bottom (you may remove the «Place your picture here» layer first). Move the image so it fits for you.
If you want to print an image for the frontside, just activate the «Enable this layer for front design» layer. The display and speaker mask will appear then. Don't use low-resolution pictures! The best result you'll get with 300 dpi and more!
2. Print the image
Now you can easily print the image onto your foil. Make sure you print the image with 300 dpi, otherwise the size of it won't be right! You'll get a better result with laser printers. Some Ink-Jets will use to much color - so the colors may stain. Additionaly laser printed images are more resistant to high humidity.
3. Cut
Next you have to remove all the black spots around your image. Cut it all away so you just have your image left.
Use a ruler with a cutter to cut straight lines.
4. Put it onto your Freerunner
Before putting anything onto the Freerunner, make sure there is no dirt on its surface!
Now carefully put the foil onto your Freerunner. Be careful that you don't create any bubbles or buckles! That's it!
If you made a good job, your Freerunner should now look much cooler than before! ;-)
How to remove the foil
If you made a mistake during the process or you don't like your new FR design you can remove the foil this way:
1. Most foils can simply be removed with a hairdrier: Just blow some warm (not too hot!) air against the foil on your Freerunner.
2. Now you can begin to remove the foil by hand - just start at one corner.
3. Thank to the «melted» glue your foil should get off easily.
4. Remove possible debris with a damped towel.
Don't use an aggressive detergent, this may damage the case!
Send me your pictures!
It would be great if we could provide the pictures you printed on this site!
So feel free to send me your photos or template files to email:info@opkg.org.


