Booting the Neo FreeRunner/es

From Openmoko

Revision as of 05:06, 27 August 2009 by Cristianpark (Talk | contribs)

(diff) ← Older revision | Latest revision (diff) | Newer revision → (diff)
Jump to: navigation, search


Contents

El Neo FreeRunner tiene dos memorias FLASH: NOR FLASH y NAND FLASH. Un 'boot loader' está presente en ambas memorias.

El proceso normal de encendido utiliza el boot loader ubicado en la NAND FLASH. La memoria NAND FLASH puede ser actualizada (escrita) usando el boot loader y una utilidad (dfu_util) la cual corre en el PC anfitrión.

La memoria NOR FLASH NO puede ser escrita usando el boot loader. La razón para esto es proveer un boot loader a prueba de fallos en la memoria NOR FLASH en caso que el boot loader de la NAND FLASH quede corrupto después de actualizarse

Las siguientes son las formas de bootear (iniciar) tu Neo FreeRunner:

Circle2.gif Puedes arrancarlo desde una imagen de Openmoko directamente (opción por defecto, cuando se enciende la primera vez).
Circle2.gif Puedes arrancarlo desde U-Boot bootloader ubicado en la NAND Flash.
Circle2.gif Puedes arrancarlo desde U-Boot ubicado en la NOR Flash.

Arrancar el sistema

Booting the device into NAND and NOR Flash allows you to update the kernel and root filesystem.

Start the Openmoko Image

Menu2.jpg

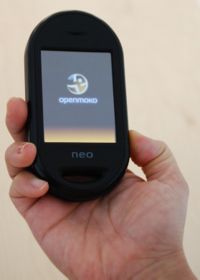
Press and hold Power button for about 8 seconds, until the Openmoko splash screen turns up. You may now release the Power button and the Neo FreeRunner will continue to boot into the Openmoko Image.

The boot time to the "Today" page is about 2 minutes. Improvements are being discussed in the Booting time reduction plan.

Log into U-Boot in the NAND Flash

Menu7.jpg
  • Press and hold Power button
  • Then while still pressing the Power button, press and hold AUX button for 5 to 8 seconds.
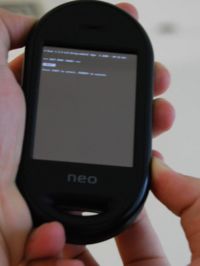
  • A boot menu will appear. This indicates the NAND flash has booted.
  • Press the AUX button to select one of the options and then press the Power button to execute.

Log into U-Boot in the NOR Flash

Menu6.jpg

This option is usually used by developers or when flashing (imaging) the FreeRunner.

  • Press and hold the AUX button
  • While still pressing the AUX button, press and hold the Power button.
  • Then release the AUX button
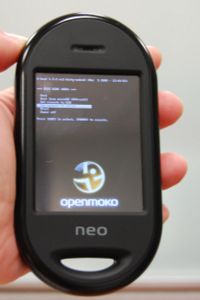
  • You should see the boot menu for the NOR Flash. This means you have entered the NOR flash.

Flashing can be performed when the NOR boot menu is active.

There are six options you can choose when you log into the NOR Flash.

  1. Boot
  2. Boot from MicroSD
  3. Set console to USB
  4. Set console to Serial
  5. Reset
  6. Power off

If you cannot log into U-Boot in NAND flash then you can log into U-Boot in the NOR flash instead.

When flashing the device via USB connection, you must choose Set console to USB by pressing the AUX key until it is highlighted and then press the power button to select it.

NOTE: The term Logging in used in this context means to turn on the device using the described method, and leaving it at the U-Boot menu. To avoid the device automatically booting, tap the AUX key to move the selector bar. Note also that the device will not automatically turn off while flashing is in progress.


Personal tools


Contents

El Neo FreeRunner tiene dos memorias FLASH: NOR FLASH y NAND FLASH. Un 'boot loader' está presente en ambas memorias.

El proceso normal de encendido utiliza el boot loader ubicado en la NAND FLASH. La memoria NAND FLASH puede ser actualizada (escrita) usando el boot loader y una utilidad (dfu_util) la cual corre en el PC anfitrión.

La memoria NOR FLASH NO puede ser escrita usando el boot loader. La razón para esto es proveer un boot loader a prueba de fallos en la memoria NOR FLASH en caso que el boot loader de la NAND FLASH quede corrupto después de actualizarse

Las siguientes son las formas de bootear (iniciar) tu Neo FreeRunner:

Circle2.gif Puedes arrancarlo desde una imagen de Openmoko directamente (opción por defecto, cuando se enciende la primera vez).
Circle2.gif Puedes arrancarlo desde U-Boot bootloader ubicado en la NAND Flash.
Circle2.gif Puedes arrancarlo desde U-Boot ubicado en la NOR Flash.

Arrancar el sistema

Booting the device into NAND and NOR Flash allows you to update the kernel and root filesystem.

Start the Openmoko Image

Menu2.jpg

Press and hold Power button for about 8 seconds, until the Openmoko splash screen turns up. You may now release the Power button and the Neo FreeRunner will continue to boot into the Openmoko Image.

The boot time to the "Today" page is about 2 minutes. Improvements are being discussed in the Booting time reduction plan.

Log into U-Boot in the NAND Flash

Menu7.jpg
  • Press and hold Power button
  • Then while still pressing the Power button, press and hold AUX button for 5 to 8 seconds.
  • A boot menu will appear. This indicates the NAND flash has booted.
  • Press the AUX button to select one of the options and then press the Power button to execute.

Log into U-Boot in the NOR Flash

Menu6.jpg

This option is usually used by developers or when flashing (imaging) the FreeRunner.

  • Press and hold the AUX button
  • While still pressing the AUX button, press and hold the Power button.
  • Then release the AUX button
  • You should see the boot menu for the NOR Flash. This means you have entered the NOR flash.

Flashing can be performed when the NOR boot menu is active.

There are six options you can choose when you log into the NOR Flash.

  1. Boot
  2. Boot from MicroSD
  3. Set console to USB
  4. Set console to Serial
  5. Reset
  6. Power off

If you cannot log into U-Boot in NAND flash then you can log into U-Boot in the NOR flash instead.

When flashing the device via USB connection, you must choose Set console to USB by pressing the AUX key until it is highlighted and then press the power button to select it.

NOTE: The term Logging in used in this context means to turn on the device using the described method, and leaving it at the U-Boot menu. To avoid the device automatically booting, tap the AUX key to move the selector bar. Note also that the device will not automatically turn off while flashing is in progress.